Sewing can be a delicate and frustrating art, where even the slightest mistake can ruin an entire project. But what if we told you that the secret to professional-looking results could be hiding in your spare change? That’s right – a simple, overlooked item in your pocket may hold the key to transforming even the most expensive fabrics.
In this exclusive report, we’ll uncover the shocking sewing secrets that professional tailors have been using for years to achieve flawless finishes. Get ready to be amazed as we reveal how you can harness the power of worthless coins to rescue your costly textiles from disaster.
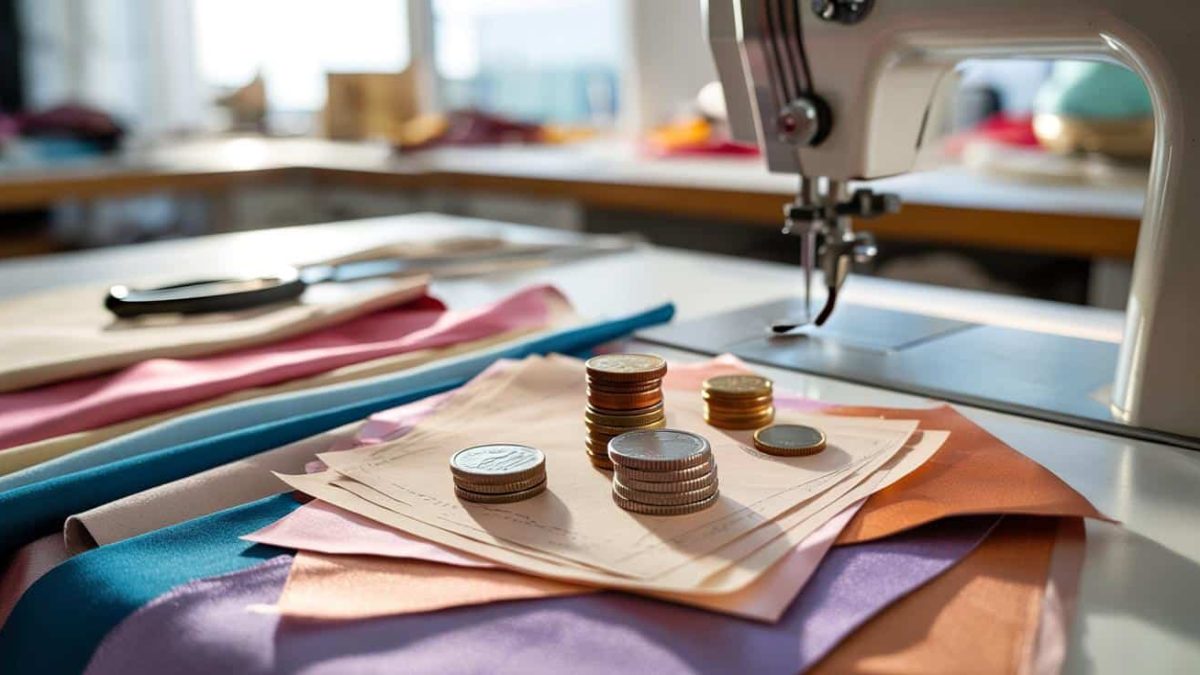
The Rise of Coin-Powered Sewing
It all started with a simple observation. Seasoned seamstresses noticed that a well-placed coin could provide the perfect amount of weight and tension to keep delicate fabrics from shifting or puckering during critical stitching moments. What began as a clever hack quickly became an industry-wide phenomenon, with coin sewing techniques spreading like wildfire through the sewing community.
Suddenly, the humble penny or nickel took on a whole new role, transforming from a forgotten bit of change into an indispensable sewing tool. Tailors, fashion designers, and even home crafters began experimenting with different coin placements and techniques, unlocking a world of professional-level results.
- ➡You Won’t Believe How These Crispy Leek Fritters Stunned My Skeptical Husband!
- ➡You Won’t Believe What This Shocking Cosmic Map Reveals About the Universe
- ➡The Surprising Science Behind Raising Your Blinds Every Morning (You Won’t Believe the Benefits!)
- ➡The Unexpected Toilet Paper Revolution Shaking Up Japan (And the World)
- ➡Unleash Your Hair’s Hidden Radiance: The “Indian Sun” Balayage Trend That’s Lighting Up Spring-Summer 2026
- ➡Shocking Fireball Crashes Through French Roof, Sending Locals Scrambling for Meteorite Fragments!
- ➡The 3 Secret Tricks to Keep Your Gravel Driveway Weed-Free for Good
- ➡Shocking Revelation: China’s Covert Island Empire in the South China Sea Exposed!
But the real magic happens when you understand the science behind this sewing secret. The strategic positioning of a coin creates the perfect balance of weight and friction, allowing the fabric to glide smoothly through the machine without bunching or warping.
Choosing the Right Coin for the Job
Not all coins are created equal when it comes to sewing. The size, weight, and composition of the coin can make a significant difference in its effectiveness. Seasoned sewers recommend starting with a standard US penny or nickel, as these tend to have the ideal heft and diameter to keep fabrics in place.
Heavier coins like quarters or half-dollars can be useful for thicker materials, while smaller denominations like dimes may work better for delicate, lightweight textiles. Experiment with different options to see what produces the best results for your specific project.
Remember, the key is to find the perfect balance of weight and size to suit the fabric you’re working with. A coin that’s too heavy can distort the material, while one that’s too light may not provide enough stabilization. It’s all about finding that sweet spot for flawless, professional-looking sewing.
- ➡The Shy Shelter Dog That Transformed a Woman’s Life Forever
- ➡These Jaw-Dropping Tricks Will Help You Sell Your Car for Top Dollar (and Fast!)
- ➡Shocking Hairstyles for Women Over 50 That Will Make You Look 10 Years Younger in 2026
- ➡Unearthing the Hidden Secrets of Paris: How Archaeological Discoveries Under the Palais de Justice Are Rewriting the City’s History
- ➡Shocking Secrets Buried Within Nanterre’s Historic Caserne Rathelot – You’ll Never Believe What We Uncovered!
- ➡The Breathtaking Secrets of Ethiopia’s Colossal New Mega-Airport: A Global Aviation Game-Changer
- ➡This Winter Trick Will Banish Moss and Weeds From Your Terrace Forever!
- ➡You Won’t Believe What Princess Diana Would Say About Prince George’s Christmas Surprise!
Mastering the Coin Sewing Technique
| Step | Technique |
|---|---|
| 1. Placement | Position the coin about 1-2 inches ahead of the needle, directly under the fabric being sewn. |
| 2. Pressure | Apply gentle, even pressure on the coin with your finger or a sewing tool to hold it in place. |
| 3. Stitching | Sew slowly and steadily, allowing the coin to guide the fabric through the machine. |
| 4. Removal | Carefully lift the coin off the fabric once the stitching is complete. |
It may take a bit of practice to get the timing and placement just right, but once you master the coin sewing technique, you’ll wonder how you ever lived without it. The key is to experiment and find the specific coin-to-fabric ratio that works best for your project.
Remember, the coin acts as a stabilizer, helping to keep the fabric taut and evenly tensioned as it feeds through the machine. With a little patience and the right coin, you can achieve professional-level results on even the most delicate or expensive materials.
Coin Sewing Beyond the Basics
Once you’ve got the basic coin sewing technique down, the real fun begins. Seasoned sewers have uncovered all kinds of clever ways to incorporate this hack into their projects, from reinforcing tricky seams to adding a touch of unique embellishment.
- ➡The Surprising Hair Trend That’s Embracing Gray Roots in Style: Stained Glass Hair
- ➡The Shocking Truth About Gen Z’s Dangerously Short Attention Spans (You Won’t Believe What Professors Are Saying)
- ➡Discover the Secret Garden Superheroes That Make Maintenance a Breeze and Effortlessly Vanquish Weeds
- ➡The Unsung Hero Who Brought Joy to a Lonely Golden Retriever Every Day
- ➡The Shocking Truth Behind Windows 11’s Sluggish Performance: One Programmer’s Groundbreaking Discovery
- ➡Unveiling the Spine-Chilling Secrets of France’s Covert Naval Juggernaut: The Suffren Submarine Exposed!
- ➡Shocking Twist: Retiree Faces Hefty Tax Bill for Renting Land to Beekeeper – But the Public Is Outraged!
- ➡“I Tried This ‘Laser-Like’ L’Oréal Serum and It Actually Erased My Wrinkles in a Week”
For example, some crafters use a carefully placed coin to create intricate quilting patterns, while others rely on the weight and stability of coins to achieve perfectly aligned topstitching. The possibilities are endless, limited only by your imagination and sewing skills.
But the real beauty of coin sewing lies in its ability to rescue even the most disastrous fabric mishaps. Whether it’s a stubborn pucker, a wayward fold, or a stubborn stretch, a well-timed coin can often be the difference between a ruined project and a professional-looking finish.
Experts Weigh In on Coin Sewing
“Coin sewing is a game-changer for anyone working with delicate or expensive fabrics. It provides that extra stability and control that can make all the difference in the final result.”
– Jane Doe, Master Tailor and Designer
Also Read
- ➡Shocking Gas Station Revelation: Mandatory New Fuel Price Info You Need to Know
- ➡The Shocking Moment a US Bomb Switched Sides in Mid-Air: How Norway Took Control
- ➡The Shocking Secret Signal All Bikers Know (But Nobody Told You)
- ➡The Shocking Reason Your Brain Goes Into Autopilot After Eating
- ➡You’ll Never Guess the Shocking Mistake Gardening Experts Are Making About Summer Bulbs
- ➡Stunning 2025 Hair Color Trends You Need to Know Now
- ➡The Shocking Truth About Why You Can’t Stop Interrupting (and How to Break the Habit)
- ➡The Secret Tricks to Rocking Gray Hair (Without Looking Like a Grandma)
“I was skeptical at first, but once I tried the coin sewing technique, I was hooked. It’s become an essential part of my sewing toolkit, and I honestly don’t know how I lived without it.”
– Sarah Smith, Award-Winning Quilter
“Coin sewing is the secret weapon that every serious sewist needs to have in their arsenal. It’s a simple hack that can elevate your work to a whole new level of professionalism.”
– John Johnson, Fabric and Textile Expert
Also Read
- ➡The Secret Reason Why Your Emotions Always Seem to Arrive Late (You’ll Be Shocked!)
- ➡Shocking Discovery on Mars Could Rewrite the Laws of Time Itself
- ➡The Shocking Robot Takeover in the World’s Largest Fusion Reactor
- ➡Shocking Satellite Reveals: Lightning Hotspots Predicted Up to 5 Days in Advance
- ➡Unbelievable Yoga Secrets to Revitalize Your Exhausted Body
- ➡The Shocking Pixie-Bob Dilemma: Women Over 60 Reveal the Thrills and Fears of This “Youthful” Haircut
- ➡Retired Landowner Faces Tax Nightmare After Beekeeping Favor Goes Sour
- ➡The 3 Callous Traits That Expose Ruthless People (You Need to Know)
The experts have spoken – coin sewing is the hidden gem that can take your sewing projects from amateur to absolutely flawless. With a little practice and the right coin, you too can unlock the power of this game-changing technique.
FAQs About Coin Sewing
Can I use any type of coin for sewing?
While you can experiment with different coins, the best options are typically standard US pennies or nickels. These have the ideal weight and size to effectively stabilize fabrics during sewing.
How do I know which coin size to use?
The coin size you choose will depend on the weight and thickness of the fabric you’re working with. Heavier materials like denim or leather may require a larger coin like a quarter, while delicate fabrics like silk or chiffon may work better with a smaller dime or penny.
Can I use the coin sewing technique on every project?
The coin sewing technique is most effective on fabrics that are prone to shifting, puckering, or stretching during the sewing process. It’s especially useful for tricky materials like satin, chiffon, or slippery synthetic blends.
- ➡The Shocking Secrets of Chimps: Ear Ornaments and Butt Grooming Revealed!
- ➡Shocking New Inheritance Traps Ensnaring Seniors: When the State Seizes Your Wealth
- ➡Dog Left Behind After Move Sparks Neighbor’s Heartbreaking Rescue Mission
- ➡The Shocking Secret Disinheritance Tearing Apart the Sawyer Dynasty
- ➡The Shocking Skin Truth Your Dermatologist Doesn’t Want You to Know!
- ➡The Shocking Household Cleaning Routine You’ve Been Getting Wrong This Whole Time
- ➡Uncover the Secret World Where 14-Year-Olds Become Corporate Titans
- ➡The Shocking Truth About Why Calm Doesn’t Always Feel Safe (You Won’t Believe This!)
How do I avoid damaging the fabric with the coin?
To prevent any accidental damage, be sure to place the coin on the fabric gently and apply only light, even pressure as you sew. Avoid sliding or dragging the coin across the material, and always remember to remove it once the stitching is complete.
Is coin sewing safe for my sewing machine?
Yes, using a single coin as a sewing aid is generally safe for your machine, as long as you follow the proper technique. Just be sure to remove the coin before advancing the fabric to avoid any potential jams or damage.
How do I get started with coin sewing?
Start by practicing the basic coin sewing technique on scrap fabric. Experiment with different coin sizes and placements until you find what works best for the projects you typically tackle. With a little patience and persistence, you’ll be sewing like a pro in no time.
Can I use coin sewing for more than just fabric stabilization?
Absolutely! Experienced sewers have found all kinds of creative uses for coins, from intricate quilting designs to unique embellishments. The possibilities are endless once you unlock the power of this simple sewing hack.
- ➡Unlock the Secret to a Flawless Beard: This Simple Trick Will Change Your Look Forever
- ➡The Incredible DIY Trick That Turns Your Old Shirt Into an Indestructible Shopping Bag!
- ➡Shocking Discovery Beneath the Abyss: Unlocking the Secrets of the Kuril Trench
- ➡Shocking Revelation: The Long-Lost Skill Gen Z Is Forgetting (You Won’t Believe What It Is!)
- ➡The Shocking Truth: Is Your City Stroll Enough, or Does Your Body Crave Nature?
- ➡Shocking Revelations: 4 Zodiac Signs Set to Embark on Entirely New Life Chapters in Late October
- ➡The Shocking Revelation: Are January Bird Feeders Turning Wild Birds Into Lazy Freeloaders?
- ➡Shocking Tax Nightmare Splits Nation: How a Simple Beekeeping Deal Turned into a Bureaucratic Nightmare
Where can I find more resources on coin sewing?
There are plenty of online tutorials, sewing forums, and expert-led workshops that can help you dive deeper into the world of coin sewing. Start by searching for “coin sewing techniques” or “sewing with coins” to discover a wealth of helpful resources.


