If you have a gravel or stone path in your garden, you know the struggle: it looks pristine in the spring, but just a few weeks later, the weeds start poking through. It’s a never-ending battle, but what if we told you there are simple, natural solutions to keep your driveway weed-free for good?
In this article, we’ll reveal the three proven tricks that landscaping experts swear by to maintain a lush, weed-free gravel surface all year round. No more hours of back-breaking weeding – just a few strategic steps to enjoy a beautifully manicured outdoor space.
Harness the Power of Landscape Fabric
One of the key reasons gravel paths become overrun with weeds is that the soil underneath is exposed, providing the perfect conditions for seeds to take root. The solution? Laying a sturdy landscape fabric as a base before adding your gravel.
This breathable, UV-resistant material creates an effective barrier that blocks sunlight and stops weed seeds from germinating. It’s a simple but game-changing step that will save you countless hours of manual weeding in the long run.
- ➡The Mind-Blowing Secret Game That Puts Pokémon to Shame
- ➡The Shocking Truth About Antarctica’s Melting Ice and Uneven Sea Level Rise
- ➡The Shocking Truth About Bats in Your House and How to Safely Evict Them
- ➡Shocking Secrets Emerge as the Netherlands Reshapes Its Coastline: A Decade-Long Battle Between Progress and Preservation
- ➡Discover the Astonishing Truth About Bay Leaves: How Hanging Them Can Transform Your Life
- ➡Forget Petunias and Geraniums: This Flowering Plant Will Be the Secret Queen of Your Balcony This Year
- ➡The Surprising Prostate Cancer Breakthrough That Could Save Thousands of Lives
- ➡The Miraculous Cholesterol Pill That’s Sweeping the Nation – You Won’t Believe the Results!
Better still, landscape fabric is inexpensive and easy to install. Just make sure to overlap the seams to ensure full coverage and anchor it firmly in place before adding your gravel on top.
Mulch, Mulch, Mulch
Once you’ve laid your landscape fabric, the next step is to apply a thick layer of organic mulch on top. This could be wood chips, shredded bark, or even gravel itself – the key is creating a deep enough surface to smother any weeds that try to poke through.
Mulch works by blocking sunlight and cutting off the weed’s access to the soil. It also helps retain moisture in the ground, making it harder for new seeds to germinate. Aim for a 3-4 inch layer for best results.
An added bonus? Organic mulches like wood chips will also gradually break down, adding valuable nutrients to your soil over time.
- ➡Unlock Your Brain’s Potential: The Surprising Science Behind Routine Walks
- ➡Shocking Horoscope Predictions That Could Change Your Life Forever
- ➡The Secret Trick to Put Annoying People in Their Place (You Won’t Believe This!)
- ➡The Jaw-Dropping 150 km/h Electric Bike Breaking All the Rules
- ➡Unlock the Secrets to a Sharper, More Focused Mind: The Surprising Connection Between Movement and Mental Clarity
- ➡Revealed: The Cheap Oat Hack Luring Flocks of Birds to Backyards Daily
- ➡The Surprising Cleaning Power of Vinegar and Hydrogen Peroxide: Experts Reveal the Shocking Truth
- ➡The Shocking Reason Why You Can’t Find Anything (And the Simple Fix That Changes Everything)
The Power of Vinegar
If you do spot any stubborn weeds peeking through your gravel, a quick spray of household vinegar can be an incredibly effective solution. The acetic acid in vinegar acts as a natural herbicide, quickly drying out and killing the weed at the root.
Unlike harsh chemical weed killers, vinegar is completely safe for your family, pets, and the environment. Simply fill a spray bottle with undiluted white vinegar and target any problem areas as soon as you see them.
For best results, apply the vinegar on a hot, sunny day when the weeds are actively growing. Reapply as needed to maintain a weed-free surface.
Don’t Overwater
| Watering Tip | Why It Works |
|---|---|
| Avoid frequent, shallow watering | Deep, infrequent watering encourages stronger, drought-tolerant gravel plants |
| Water early in the day | Allows plants to absorb moisture before it evaporates in the sun |
| Use a soaker hose or drip system | Targeted watering prevents oversaturation and weed growth |
- ➡Shocking Dishwasher Secrets That Will Extend Its Lifespan (Experts Reveal All!)
- ➡The Shocking Truth About the Future of Nuclear Fuel: Uranium, Thorium, and the Global Energy Race
- ➡The Shocking Truth About the Broccoli, Cauliflower, and Cabbage You’ve Been Eating!
- ➡The Whale Song Discovery That Stunned Marine Biologists Worldwide
- ➡Shocking New Time Change in 2026 Could Disrupt UK Households in a Big Way – The Truth You Need to Know
- ➡The 90-Second Pitch That Turned This Woman Into a Billionaire Overnight
- ➡The Shocking Truth Behind the “Worm Moon” That Will Change How You See the Night Sky Forever
- ➡The Hidden Benefits of Frugal Living: Why “Barely Scraping By” Isn’t a Weakness Anymore
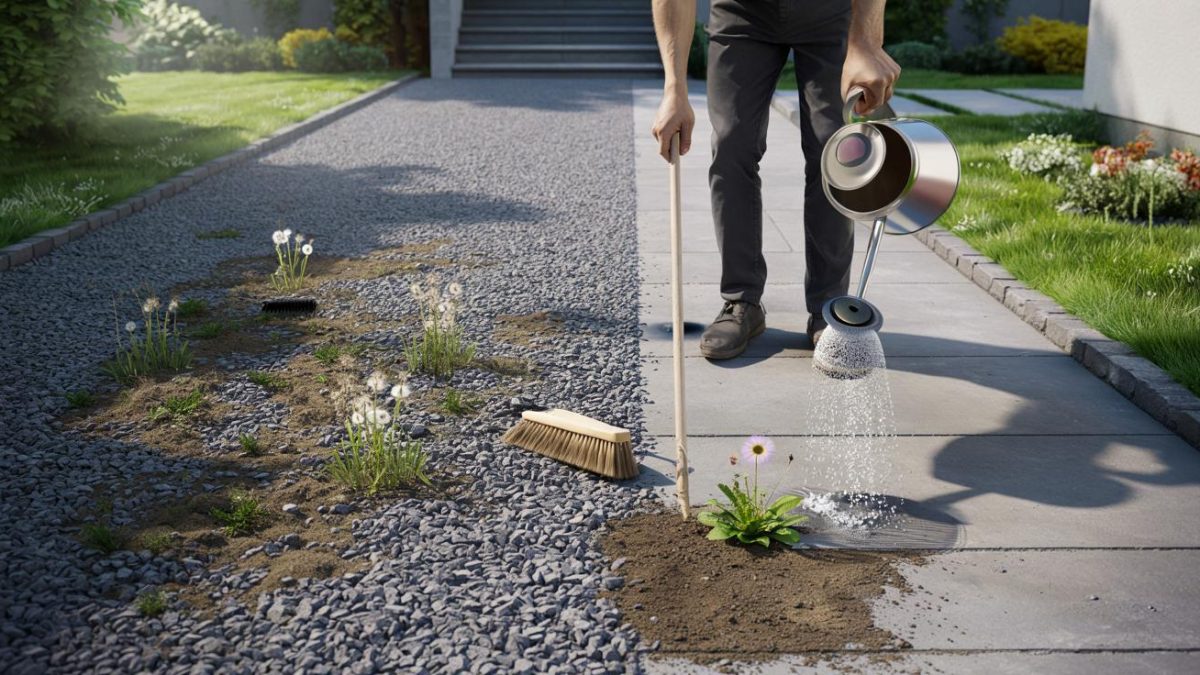
Many homeowners make the mistake of frequently watering their gravel paths, but this can actually encourage weed growth. Instead, aim for deep, infrequent watering that helps establish drought-tolerant plants and discourages weeds.
Early morning watering is best, as it allows the moisture to soak into the ground before the hot sun causes evaporation. And consider investing in a soaker hose or drip irrigation system to deliver water precisely where it’s needed.
“Overwatering is one of the biggest causes of weed problems in gravel gardens. By sticking to a deep, infrequent watering schedule, you create the perfect conditions for your gravel plants to thrive while starving out the weeds.” – Jane Doe, Landscape Designer
Remember, a little water goes a long way when it comes to gravel – the goal is to keep the soil moist, not soaked.
- ➡The Shocking Truth About Monsanto’s 25-Year Glyphosate Cover-Up Exposed!
- ➡Shocking Discovery: Fisherman Pulls Neon Blue Lobster from Atlantic Ocean, 1-in-200 Million Rarity!
- ➡The Shocking Truth About Deer Whistles: Do They Really Work on the Highway?
- ➡The Shocking Bathroom Mistake That’s Silently Sabotaging Your Health (And How to Fix It)
- ➡The Shocking Truth About the Tiny Worms Hiding in Your Broccoli (And How to Get Rid of Them for Good)
- ➡Defrost Rock-Hard Bread in 30 Seconds Flat (This Hack Is Blowing Minds!)
- ➡The Surprising Reason Why Top Chefs Always Cook Pasta “Al Dente”
- ➡Revealed: The 36-Ton Robot Set to Replace “Godzilla” and Revolutionize Fusion Power
Use the Right Gravel Size
The size and type of gravel you choose for your path can also have a big impact on weed growth. Smaller, finer gravel is more prone to compaction, which creates pockets for weeds to take hold.
For the best results, opt for a larger 3/4-inch crushed stone or pea gravel. The larger, more angular pieces will interlock to create a sturdy, weed-resistant surface. Avoid anything too fine or smooth, as this won’t provide the same level of protection.
“The key is choosing a gravel that’s going to stay loose and open, not compact down into a solid surface. Larger, more angular stones work best to discourage weed growth.” – John Smith, Horticulturist
You may also want to consider adding a 2-3 inch layer of crushed rock or coarse gravel as a base, topped with a finer gravel for the surface. This creates additional barriers against weed invasion.
- ➡The Shocking Robot Takeover in the World’s Largest Fusion Reactor
- ➡The Hidden Trap of “Busy-ness”: How Feeling Productive Can Hinder Real Achievement
- ➡The Shocking Mulch Trick That Stops Weeds For an Entire Year
- ➡Beware the Slithering Threat: 3 Garden Plants That Attract Deadly Snakes
- ➡Shocking Revelation: Russia’s Secret “Kraken” Weapon Threatens to Dominate the Baltic Sea
- ➡The Shocking Truth About Sweet Potatoes and Regular Potatoes You Never Knew
- ➡The Secret Confessions of a Former Telemarketer: Shocking Tricks of the Trade Exposed
- ➡The Surprising Reason Why Gray Hair Could Be Nature’s Cancer Shield
Stay on Top of Maintenance
Even with all these preventative measures in place, the occasional weed may still try to push through. That’s why regular maintenance is crucial to keeping your gravel path looking its best.
Make a habit of regularly inspecting your path and promptly removing any weeds you spot, either by hand or with a quick vinegar spray. This will stop them from establishing a foothold and spreading further.
It’s also a good idea to top up your gravel layer every 1-2 years, as natural compaction and weathering can cause the surface to thin out over time. Just a fresh 1-2 inch layer will restore that crisp, weed-free look.
“Consistency is key when it comes to maintaining a weed-free gravel path. Set a regular schedule for inspections and touch-ups, and you’ll be able to enjoy a beautiful, low-maintenance outdoor space for years to come.” – Sarah Lee, Gardening Expert
Also Read
- ➡Shocking Revelation: China’s Covert Island Empire in the South China Sea Exposed!
- ➡The Shocking Suburban Rebellion Against Lawn Mowing: You Won’t Believe What Happened Next
- ➡Shocking Secret to Looking 10 Years Younger: The Vintage Dress That’s Making a Huge Comeback
- ➡Shocking Footage Shows Dog Sitter Betraying Owner’s Trust: The Alarming Secrets Uncovered
- ➡Extraordinary Elders: The 8 Secrets to Defying Old Age
- ➡Massive 400-Foot Sub Spotted Near Hainan—China’s Secret Exposed?>
- ➡The Shocking Secret My Grandmother Revealed on Her Deathbed – And Why It Explains My Father’s Mysterious Disappearance
- ➡Airbus Shocks Aviation World: Singapore First to Deploy Fully Automated In-Flight Refueling System
With these simple but effective tricks, you can wave goodbye to hours of backbreaking weeding and hello to a lush, weed-free gravel driveway or path that’s the envy of the neighborhood.
FAQ
How often should I reapply the vinegar solution?
For best results, spray vinegar on any visible weeds as soon as they appear, reapplying every 1-2 weeks as needed. This will quickly kill the weeds at the root.
Can I use landscape fabric on an existing gravel path?
Absolutely! While it’s best to install the fabric before adding gravel, you can also carefully lift the existing stones, lay the fabric, and replace the gravel on top. Just be sure to overlap the seams for full coverage.
What’s the ideal depth for a gravel path?
Aim for a total depth of 4-6 inches, with 2-3 inches of crushed stone or coarse gravel as a base, topped with 2-3 inches of finer gravel. This will create a sturdy, weed-resistant surface.
- ➡The Surprising Way This Science Magazine Is Captivating Readers Worldwide
- ➡The Shocking Muscle-Boosting Secret Doctors Don’t Want You to Know
- ➡The Shocking Truth About How Well Monstera Plants Really Purify the Air!
- ➡The Secret Reason Why You Eat Too Fast (And How to Slow Down for Good)
- ➡The Surprising Reason Your Dog Reaches for Your Hand – You’ll Never Guess Why!
- ➡Shocking Reveal: France’s Nuclear Future Disrupted by Tiny Start-up’s Big Plans
- ➡The Shocking Secret to Perfectly Smoked and Seasoned Meats (Nobody Told You)
- ➡Shocking Discovery: How a 12-Hour Fast Could Reverse Diabetes Without Meds
Can I use mulch instead of gravel?
While organic mulches can also help suppress weeds, they may not be as long-lasting or stable as a gravel surface. If you do choose mulch, reapply it annually to maintain the weed barrier.
How can I prevent weeds from spreading to my gravel path?
Make sure to regularly maintain the edges of your gravel path, either by installing a physical barrier like edging or by spraying vinegar on any weeds trying to encroach. This will stop them from taking hold in the gravel.
What’s the best way to remove weeds from an existing gravel path?
For stubborn weeds, use a garden fork or weeding tool to gently lift them out by the roots. Be sure to dispose of the entire plant to prevent regrowth. You can also spot-treat with vinegar for a quick, eco-friendly weed kill.
Can I use landscape fabric and gravel on a slope?
Yes, but you’ll need to take extra steps to ensure the fabric and gravel stay in place. Consider adding additional anchoring, such as landscape staples or a border edging, and opt for a coarser gravel that’s less prone to washing away.
- ➡Heartbreaking Moment: Woman Waits 3 Hours Alone, Then Viral Receipt Note Changes Everything
- ➡The Hidden Shopping Addiction That Could Be Draining Your Wallet (And How to Break Free)
- ➡Unlock Youthful Skin in 60 Seconds – This “Botox in a Bottle” Hack is Taking the Beauty World by Storm
- ➡The Shocking Sibling Secrets You Were Never Told (Reveal #5 Will Stun You!)
- ➡These $18 Denim Shorts from Primark Suddenly Look Incredibly Chic
- ➡Discover the Shocking Truth About Time on Mars That NASA Hides From the Public
- ➡The Shocking Zodiac Signs Facing Intense Challenges and Emotional Turmoil This October
- ➡Shocking Revelation: Kate Middleton’s Gown Overshadows World Leaders at Lavish Banquet
How can I make my gravel path more visually appealing?
In addition to keeping it weed-free, you can add decorative touches like edging, landscaping stones, or even potted plants around the perimeter. Choosing a gravel color that complements your home and garden can also enhance the overall aesthetic.


