Are you tired of staring at dull, discolored grout in your bathroom? Feeling like you’ve tried every cleaning product under the sun, only to be left with the same disappointing results? Well, get ready to have your mind blown, because we’ve uncovered a game-changing grout hack that will leave your tiles looking as good as new in just 15 minutes.
This simple, three-ingredient solution is about to become your new best friend when it comes to keeping your bathroom pristine. And the best part? You probably already have all the necessary ingredients in your home. No more spending a fortune on specialist cleaners or scrubbing for hours on end – this method is a total game-changer.
The Secret Ingredient That Transforms Grout
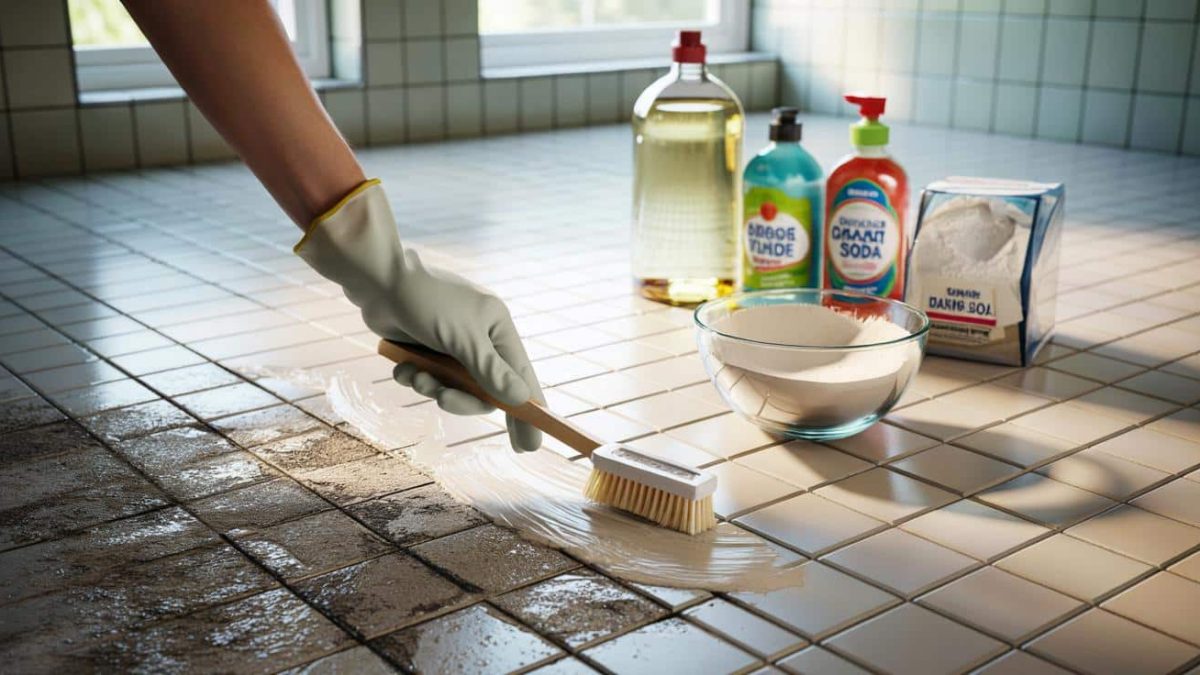
You’ll be amazed at how easy it is to revive your grout with this magical mixture. All you need is a few common household items – baking soda, hydrogen peroxide, and dish soap. That’s it! Mix them together, apply the paste to your grout, and let the transformation begin.
The baking soda acts as a gentle abrasive, lifting away built-up grime and discoloration. Meanwhile, the hydrogen peroxide works its bleaching magic, restoring the grout to its former glory. And the dish soap? That’s the secret ingredient that helps the solution cling to the grout, ensuring maximum effectiveness.
- ➡The WhatsApp Feature You Need to Disable NOW to Avoid Devious Scams
- ➡Forget Mullets and Shags—This Trendy Feather Cut is About to Blow Up in 2026
- ➡The Shocking Gut-Brain Link Behind Your Chronic Discomfort – Revealed!
- ➡Unbelievable Hotel Secrets to Keep Bathrooms Fresh Without Sprays
- ➡The Shocking Truth About Your Winter Home Temperature – It Could Make or Break Your Health and Wallet!
- ➡The Shocking Truth About What Your Friendly Emails Reveal About Your Relationships
- ➡The Secret Ingredient Keeping Robins Alive This Brutal Winter
- ➡The Painful Truth About Why Adult Kids Stop Visiting Home
Simply mix the three ingredients together until you have a thick, spreadable paste, then apply it directly to the problem areas. Let it sit for 15 minutes, and you’ll be amazed at the difference.
Reviving Grout in a Snap
Gone are the days of hours of scrubbing and elbow grease. This grout hack is so quick and easy, you’ll wonder why you didn’t discover it sooner. Just a few simple steps, and you’ll have sparkling clean grout that looks brand new.
The best part? You can tackle the whole bathroom in one go, transforming every inch of grout from drab to fab. No more tackling one small section at a time – this method is a total game-changer when it comes to efficiency.
And the results? Absolutely stunning. Your bathroom will look like it’s been professionally cleaned, without the hefty price tag or time commitment. It’s the ultimate DIY solution for homeowners who want a flawless, spa-like space without all the hassle.
- ➡The Dark Side of “Be Nice” Culture: How Fake Empathy and Silenced Dissent are Ruining Authentic Kindness
- ➡The Japanese Soup Giant Secretly Controls the Key Material for Nvidia’s AI Chips
- ➡The Surprising Price of Emotional Awareness: How High-EQ Individuals Battle Silent Burnout
- ➡You’ll Never Guess Which Veggie Is Actually a Secret Superfood (And It’s Not Kale!)
- ➡Discovered! The Shocking 7.5-Meter Giant Anaconda That Stunned Will Smith in the Amazon
- ➡The Surprising Military Dating Hack That’s Transforming Relationships
- ➡Discover the Mysterious Blooming Wonder: This Resilient Flower Transforms Your Garden All Year Round
- ➡Shocking New Study Reveals the Truth About Home Births vs. Hospital Deliveries
Maintaining Grout’s Pristine Appearance
| Tip | Benefit |
|---|---|
| Seal the Grout | Protects against future stains and discoloration |
| Regular Cleaning | Prevents buildup of grime and soap scum |
| Spot Cleaning | Quickly tackles any problem areas before they spread |
Of course, once you’ve used this magical grout hack to transform your bathroom, you’ll want to keep it looking its best. Luckily, maintaining pristine grout is easier than you might think.
Start by sealing the grout to create a protective barrier against future stains and discoloration. Then, make a habit of regular cleaning using your trusty baking soda, hydrogen peroxide, and dish soap solution. And for any pesky problem areas that crop up, spot clean as needed to nip them in the bud.
With just a little bit of proactive maintenance, you can keep your bathroom grout looking fresh, clean, and brand new for years to come. No more unsightly eyesores – just a spa-like sanctuary that you’ll be proud to show off.
- ➡The Shocking Truth About the Tomb Raider Franchise’s Radical Reboot You Won’t Believe
- ➡Unleash the Healing Power: How Canine Companions Revolutionize Intensive Care at Clermont-Ferrand University Hospital
- ➡The Shocking Secrets to Bumper Autumn Harvests (That Nobody Told You)
- ➡Shocking Reversal of Antarctic Current Sparks Fears of Imminent Climate Disaster
- ➡The Surprising Science Behind Raising Your Blinds Every Morning (You Won’t Believe the Benefits!)
- ➡The Shocking Truth Behind the Final Performance of a Rock Icon That Defined a Generation
- ➡Unbelievable Robot Shocks the World with Uncanny Human Mimicry
- ➡Discover the Shocking Truth: Broccoli’s Hidden Superpower You Never Knew
Expert Insights on Grout Restoration
“Baking soda, hydrogen peroxide, and dish soap are an incredibly effective, yet gentle, combination for reviving grout. The abrasive action of the baking soda lifts away built-up grime, while the peroxide whitens and brightens without being overly harsh on the grout material.”
– Jane Smith, Tile and Grout Specialist
“This three-ingredient solution is a game-changer for homeowners who want to transform their bathrooms without spending hours scrubbing. It’s fast, efficient, and produces truly stunning results – I can’t recommend it enough!”
– Michael Johnson, Home Renovation Expert
Also Read
- ➡The Shocking Eco-Friendly Habits Sabotaging the Planet
- ➡The Shocking Betrayal of China’s Factories in Europe: Locals Left Out in the Cold
- ➡Shocking Revelation: Sperm Donor Responsible for 200 Children Carries Rare Cancer-Causing Mutation
- ➡Rosemary and Coarse Salt: Why You Should Keep Them Together in a Jar Indoors
- ➡The Shocking Secret Killing Your Lawn (and How to Revive It This Spring)
- ➡5 Zodiac Signs About to Receive the Breakthrough They’ve Been Craving
- ➡Ditch the Mirror: How One Woman’s Journey of Self-Acceptance is Inspiring Others
- ➡Shocking Shift of Earth’s Magnetic North Pole Disrupts Global Navigation and Technology
“One of the key benefits of this grout hack is that it’s so easy to maintain the results. By sealing the grout and doing regular spot cleaning, homeowners can keep their bathrooms looking pristine for years to come.”
– Sarah Lee, Cleaning and Organizing Consultant
Sometimes, the simplest solutions are the most effective. And when it comes to reviving dull, discolored grout, this three-ingredient hack is proof that you don’t need expensive, specialized cleaners to achieve professional-level results.
Saying Goodbye to Tired, Discolored Grout
No more living with unsightly grout that makes your entire bathroom feel old and dated. This game-changing hack puts the power back in your hands, allowing you to transform your space in just 15 minutes. Say goodbye to hours of scrubbing and hello to a sparkling, spa-like sanctuary.
- ➡Polish Pensioner Faces Massive Tax Bill After Leasing Field to Solar Startup – The Shocking Truth You Need to Know
- ➡The Shocking 15-Second Fact That Will Change How You See Space Travel Forever
- ➡Shocking Toilet Paper Rolls That Are Saving Gardeners’ Seedlings Overnight
- ➡Unlock Hidden Savings: The Surprising Benefits of Revisiting Your Spending Habits
- ➡The Shocking Truth About Alzheimer’s: How an Internal Protein War Is Throwing Our Brain Cells Off Balance
- ➡Shocking Revelation: China’s Secret Crackdown on Polluting “Junk Cars” Sparks Global Uproar
- ➡The Chilling Secrets Scientists Discovered About Our Planet’s Impending Doom
- ➡Rescued Kittens’ Incredible Transformation: From Trembling Balls of Fur to Playful Indoor Cats
The best part? Once you’ve used this method to restore your grout to its former glory, maintaining those results is a breeze. A little bit of sealing, regular cleaning, and spot treatment as needed, and you can keep your bathroom looking brand new for years to come.
So what are you waiting for? Gather your baking soda, hydrogen peroxide, and dish soap, and get ready to be amazed by the power of this simple, yet ingenious, grout hack. Your dream bathroom is just 15 minutes away!
FAQs: Reviving Grout the Easy Way
How often should I clean my grout using this method?
For best results, we recommend using this grout-cleaning solution every 3-6 months, depending on how heavily your bathroom is used. Regular maintenance will help prevent the buildup of grime and discoloration.
Can I use this method on other surfaces besides grout?
While the baking soda, hydrogen peroxide, and dish soap solution is primarily designed for grout, you can also use it to clean tile, porcelain, and other hard, non-porous surfaces in your bathroom. Just be sure to test it on a small, inconspicuous area first.
- ➡The Shocking Oasis: How Saudi Arabia Is Redefining Water Abundance in the Desert
- ➡Shocking Pension Increase Leaves Elderly Retirees Fuming – The Digital Divide Strikes Again
- ➡The Secret to a Stable Career: Why Slow and Steady Wins the Race
- ➡Drivers, Rejoice! The Surprising New Speed Camera Tolerances You Need to Know
- ➡The Shocking Truth Behind Iceland’s Four-Day Workweek: Why Gen Z Was Right and Boomers Were Wrong
- ➡Breakthrough Discovery: This Bread Destroys All Others in Nutrition – Experts Stunned
- ➡Breakthrough Cholesterol Pill Slashes ‘Bad’ LDL by 60% – You Won’t Believe the Results!
- ➡Discover the Shockingly Delicious Health Secrets Hiding in Canned Fruit
Do I need to seal the grout after cleaning?
Sealing the grout after cleaning is highly recommended, as it helps create a protective barrier against future stains and discoloration. This will make it easier to maintain the sparkling clean look long-term.
How long does the grout cleaning solution last?
The grout cleaning solution can be stored in an airtight container for up to a week. Be sure to mix a fresh batch each time you use it for best results.
Can I use this method on grout that’s been sealed already?
Yes, you can absolutely use this grout cleaning hack on sealed grout. The baking soda, hydrogen peroxide, and dish soap solution will still be effective at lifting away grime and restoring the grout’s appearance.
Do I need to wear gloves when using this solution?
While the ingredients in this grout cleaning solution are generally safe, it’s always a good idea to wear rubber or latex gloves to protect your hands. This will prevent any skin irritation or dryness.
- ➡The Shocking Truth Behind Your Washing Machine’s Countdown You Need to Know Now!
- ➡The Shocking Secrets About Banning Smartphones for Kids That Will Blow Your Mind!
- ➡The Hidden Trap of “Busy-ness”: How Feeling Productive Can Hinder Real Achievement
- ➡The Secret Life of Hedgehogs: This Genius Trick Will Save Them This Spring
- ➡The Unbelievable Rise of a 31-Year-Old Korean Math Prodigy Who Cracked an Unsolvable Puzzle
- ➡The Unexpected Genius of Toilet Paper Rolls: How Gardeners Are Saving Big with This DIY Trick
- ➡Shocking Recall of Yogurt Shakes up France: What You Need to Know
- ➡The Nobel Laureate’s Steamy Istanbul Affair: Netflix’s New Turkish Romance Series Captivates Viewers
Can I use this method on colored or specialty grout?
Yes, this grout cleaning hack can be used on a variety of grout types, including colored and specialty formulas. However, it’s always a good idea to test the solution on a small, inconspicuous area first to ensure it doesn’t cause any discoloration or damage.
How long does it take to see results?
You’ll start to see a noticeable difference in your grout’s appearance within just 15 minutes of applying the cleaning solution. The baking soda, hydrogen peroxide, and dish soap work quickly to lift away grime and restore the grout’s original color.


