Does your tile grout look like it’s seen better days? That dingy, discolored grout can really drag down the entire look of a room, making even the sparkliest tiles appear dull and dated. But fear not, weary homeowner – there’s a quick and easy trick that can breathe new life into your grout without the hassle of a full-blown replacement.
Forget about scrubbing for hours or hiring expensive professionals. With just a few common household items, you can revive that tired grout and restore the shine to your tiles. Prepare to be amazed at just how simple it is to reclaim the clean, bright look you’ve been craving.
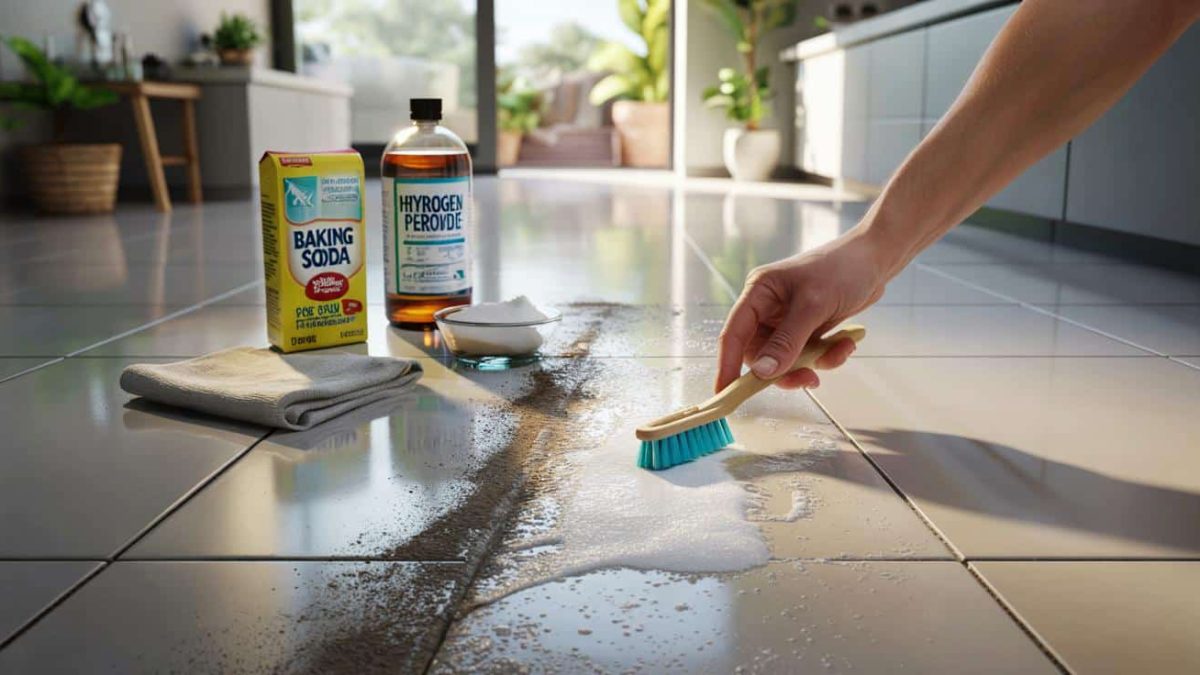
Unlock the Power of Baking Soda and Vinegar
The secret weapon in your grout-cleaning arsenal? A dynamic duo you likely already have in your kitchen – baking soda and white vinegar. These two unassuming ingredients pack a powerful punch when it comes to lifting stubborn stains and restoring that pristine grout you love.
Start by liberally sprinkling baking soda over the discolored grout. Let it sit for a few minutes to allow the baking soda to work its magic. Then, generously spray or pour white vinegar over the baking soda, creating a fizzing, bubbling reaction. Allow this mixture to sit for 10-15 minutes, giving it time to really penetrate and break down the grime.
- ➡The Shocking Truth About Russia’s Deadliest Submarine: A Story of Ambition, Innovation, and Catastrophic Failure
- ➡The Shocking Truth About the Truman Aircraft Carrier’s Return: A Critical Mistake the US Navy Is Making for Future Conflicts
- ➡Unleash the Hidden Gems of Your Garden: 3 Groundcover Plants That Bloom All Year Round
- ➡The Shocking Secrets Buried Beneath Antarctica’s Eternal Ice
- ➡The Shocking Truth About the 19°C Heating Rule That Experts Want You to Know
- ➡Shocking Discovery: 6th-Century Sword Unearthed in England, Revealing Secrets of the Past
- ➡The Shocking Truth About Boiling Pasta Water – You’ll Never Drain the Same Way Again
- ➡The Shocking Ransomware Defense You Need to Protect Your Small Business for Under $100
Once the time is up, grab an old toothbrush or grout brush and start scrubbing. The baking soda and vinegar will have softened the dirt, making it a breeze to scrub away years’ worth of buildup. Rinse the area thoroughly with clean water, and voila – your grout is now sparkling clean!
Maintain That Sparkling Grout
Now that you’ve put in the hard work to refresh your grout, it’s important to keep it looking its best. Regular maintenance with a simple vinegar-based cleaning solution can help prevent future discoloration and stains.
Mix equal parts white vinegar and water in a spray bottle, and mist the grout lines whenever you clean your tiles. Let the solution sit for a few minutes before wiping away with a damp cloth or mop. The vinegar will help break down any dirt or grime before it has a chance to set in.
Additionally, be mindful of the products you use on your tiles. Harsh chemical cleaners can actually erode the grout over time, leading to cracks and crumbling. Stick to gentle, pH-neutral solutions, and avoid anything too abrasive.
- ➡The Shocking Secret Trick to Keep Strawberries Fresh for Weeks (You Won’t Believe This!)
- ➡The Surprise Lidl Gadget That’s Poised to Revolutionize Your Kitchen
- ➡Unbelievable Satellite Images Expose Saudi’s $2 Trillion Desert Megacity – The Dark Secrets Behind This Colossal Project
- ➡The Heartbreaking Secret That Haunted Her Husband’s Final Hours
- ➡Iceland’s 4-Day Workweek Gamble Pays Off – The Shocking Truth Gen Z Saw Coming!
- ➡The Shocking Discovery That Changed My Family Forever: Unlocking the Secrets of the Forbidden Room
- ➡Shocking Discovery: Mammoths and Dinosaurs Moved Slower Than We Thought, Turning Prehistoric Knowledge Upside Down
- ➡Newly Discovered Alien Megastructure Shocks Astronomers: The Startling Truth About Our Solar System’s Secrets
Avoid Common Grout-Cleaning Mistakes
As tempting as it may be to reach for the strongest, most industrial-strength cleaners, that’s often the wrong approach when it comes to grout. These heavy-duty products can actually do more harm than good, stripping away the protective sealant and leaving the grout vulnerable to future stains.
Another common mistake is using a stiff-bristled brush or scouring pad, which can scratch and damage the grout. Stick to softer tools like an old toothbrush or a dedicated grout brush to gently lift away the dirt. And be sure to rinse the area thoroughly after cleaning to remove any residual cleaner.
Finally, don’t be too aggressive with the scrubbing. While you want to put in the elbow grease to get it clean, excessive force can actually cause the grout to crumble and break down over time. Take it slow and steady for the best results.
Embrace the Beauty of Clean, Bright Grout
Once you’ve restored your tile grout to its former glory, prepare to be amazed at the transformation. That dull, dingy space will suddenly feel fresh, modern, and so much more inviting. The clean, bright grout lines will make your tiles pop, giving the entire room a whole new lease on life.
- ➡The Shocking Truth About “Simple” Days That Drain You the Most
- ➡The “Miracle” Breakfast Cardiologists Can’t Get Enough Of (And How It Could Save Your Life)
- ➡The Shocking Truth About How Your Brain’s ‘Hourglass’ Controls Your Every Move
- ➡The Shocking Truth About Deer Whistles: Do They Really Work on the Highway?
- ➡The Secret Trick Grandma Used to Keep Her Houseplants Healthy All Winter Long
- ➡The Shocking Truth About the Tomb Raider Franchise’s Radical Reboot You Won’t Believe
- ➡Snowstorm Chaos: Employers Threaten Job Loss as Officials Beg Drivers to Stay Off Perilous Roads
- ➡Shocking Secrets: How Trauma Shatters the Mind and Triggers Dissociative Disorders You Never Knew Existed
Embrace this newfound grout confidence and show it off to friends and family. They’ll be amazed at how you managed to revive your tiles without having to rip everything out and start from scratch. And you’ll feel a sense of pride every time you look at your sparkling, rejuvenated space.
So don’t let those stubborn grout stains get you down any longer. Harness the power of baking soda and vinegar, and get ready to fall in love with your tiles all over again.
FAQs
How often should I clean my tile grout?
For best results, aim to clean your tile grout every 6-12 months. This will help prevent excessive buildup and keep your grout looking its best.
Can I use a grout cleaning machine?
While grout cleaning machines can be effective, they’re often not necessary for light to moderate stains. The baking soda and vinegar method is a much more affordable and accessible option for most homeowners.
- ➡Shocking Black Roll From Hardware Store Ruins Raised Beds in the South – Without You Even Knowing
- ➡The Shocking Truth About Micro-Sleeps: How Your Brain Is Betraying You While You’re Awake
- ➡The Shocking Natural Fertilizer That Can Revive Your Lawn Overnight
- ➡Grandma’s Secret Trick Demolishes Limescale (Brands Hate This!)
- ➡The Shocking Truth About How 1960s and 70s Kids Became the Most Resilient Generation
- ➡The Shocking Secret Old-Time Gardeners Used to Grow the Most Beautiful Roses
- ➡The Courageous Journey of the Black Sheep: How Distance Can Forge Self-Discovery
- ➡The Shocking Reason Why Your Afternoon Productivity Plummets (And How to Fix It)
What if the baking soda and vinegar don’t work?
If your grout is particularly stubborn, you may need to try a grout-specific cleaner or even a mild bleach solution. Always spot-test in an inconspicuous area first to ensure it doesn’t damage the grout or tiles.
How do I prevent grout stains in the future?
Regular cleaning and maintenance with a vinegar-based solution, as well as sealing the grout every 1-2 years, can help keep it looking its best for the long haul.
Can I change the color of my grout?
Yes, you can use a grout pen or re-grouting to change the color of your tile grout. This is a great option if you want to update the look of your space.
How do I know if my grout needs to be replaced?
If the grout is crumbling, cracking, or missing in large sections, it’s likely time to regrout your tiles. Consult a professional for the best approach.
- ➡Unlock the Shocking Secret to Mental Strength: Solitude Revealed
- ➡The Surprising Way Your Brain Can Heal Your Gut and Cure Lactose Intolerance
- ➡The Shocking Truth That Made a Therapist Break the Rules and Changed a Family Forever
- ➡The Shocking Astrological Forecast Revealing Who Will Find Love in 2026
- ➡This Magical Bedtime Chart Transformed 4-Year-Olds’ Bedtime Struggles Overnight
- ➡The Forgotten Voices: Heartbreaking Search for Grandparents’ Lost Cassette in Rome
- ➡The Shocking Collapse of Gold and Silver Prices Revealed!
- ➡The Surprising Elevators of Shenzhen: How “Sky Couriers” Deliver Meals to Towering Skyscrapers
Can I clean grout with a steam cleaner?
Using a steam cleaner on grout can be effective, but it’s important to use the lowest setting and keep the steam moving to avoid damaging the grout.
Is it safe to use bleach on grout?
Bleach can be used to clean grout, but it should be diluted and used sparingly. Excess bleach can discolor or weaken the grout over time.


