Have you ever stared at your bathroom tiles, cringing at the sight of dingy, discolored grout lines? You’re not alone. Grout is notoriously difficult to keep looking fresh and pristine, especially in high-traffic areas like the shower. But what if we told you that professional cleaners have a secret trick to whiten grout without resorting to harsh chemicals?
Believe it or not, the solution is simpler than you might think. No need for abrasive scrubs or toxic bleach – just a few common household ingredients and a little elbow grease. In this article, we’ll reveal the step-by-step process that cleaning pros use to bring new life to grimy grout, no chemicals required.
Understanding the Enemy: Why Grout Discolors So Quickly
Grout is the cement-based material that fills the gaps between tiles, securing them in place and creating a seamless, waterproof surface. While durable, grout is also highly porous, making it a magnet for dirt, grime, and bacteria. Over time, the once-pristine white or light-colored grout can become stained, discolored, and downright unappealing.
The culprit behind this unsightly transformation? A combination of factors, including soap scum buildup, hard water stains, mold and mildew growth, and just plain old everyday use. Scrubbing with harsh chemicals might provide temporary relief, but it often does more harm than good, stripping the grout of its protective sealant and causing further deterioration.
- ➡From Dropout to Millionaire: The Incredible Rise of Marcus Chen
- ➡The Shocking Silence That’s Gripping Panama’s Once-Vibrant Seas
- ➡The Shocking Handwriting Trick That Can Defy Aging for Seniors
- ➡The Hidden Psychological Battle Behind the Need for the Last Word
- ➡Shocking Incident: Lithuania Turns to NATO After Russian Drone Debacle
- ➡The Shocking Truth About Prostate Cancer: New Discoveries That Could Save Your Life
- ➡Shocking Discovery: Massive Polar Vortex Disruption Threatens Global Climate Stability in 2026
- ➡What Emerges When Scientists Feed the Deep Ocean (You Won’t Believe It)
Fortunately, there’s a better way to revive those dingy grout lines – one that professional cleaners have been using for years.
The Surprising Ingredient That Outshines Chemicals
The secret to the pros’ grout-cleaning success? Baking soda. That’s right – this humble household staple is the key to restoring your bathroom’s grout to its former glory, without the need for abrasive scrubs or toxic chemicals.
Baking soda is a mild abrasive that can gently lift away built-up grime and discoloration without damaging the grout itself. And when combined with a few other common ingredients, it becomes a powerful, yet safe, cleaning solution that even the most seasoned cleaning pros swear by.
Step-by-Step: The Professional’s Guide to Grout Restoration
Ready to try the pros’ grout-cleaning trick for yourself? Here’s a step-by-step guide to getting your bathroom tiles looking sparkling clean, no chemicals required:
- ➡Shocking Biological Lab Discovered Inside Las Vegas Home: FBI Issues Urgent Alert
- ➡The Shocking Reason You Should Sleep on It Before Buying That New Outfit
- ➡Gardeners, Beware the Shocking $135 Rainwater Fine Starting March 18th!
- ➡The Chilling New Gas Station Scam Draining Drivers Dry – You Won’t Believe This!
- ➡Shocking Reveal: 94-Year-Old Man Forced to Stop Driving, Retirement Eaten by Predatory Lease
- ➡Ditch the Balance Board! How Walking Barefoot at Home Can Transform Your Fitness for Free
- ➡Scientists Just Opened a 50-Year-Old Salmon Can. The Secret Inside Changes Everything
- ➡Starlink Now Enables Satellite Internet Directly on Mobile Phones – No Installation, No Hardware Change, Just Instant Coverage
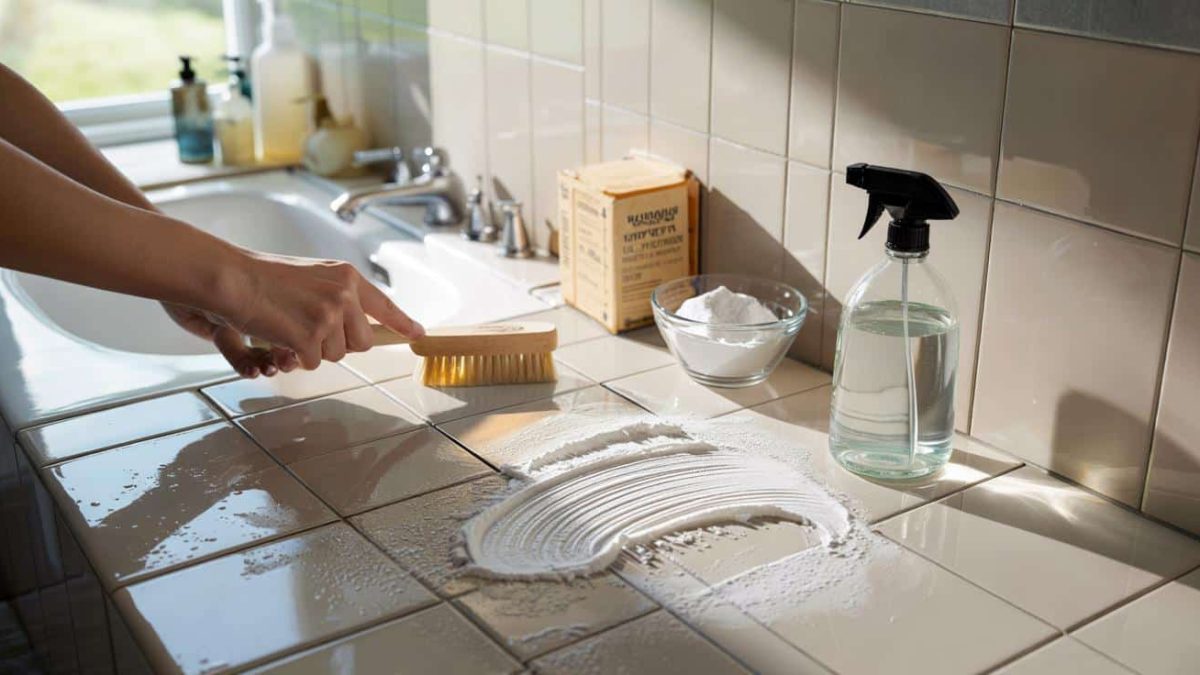
Gather Your Supplies
The key to this method is using the right tools for the job. You’ll need:
– Baking soda
– Hydrogen peroxide (or white vinegar)
– An old toothbrush or small scrub brush
– Rubber gloves (optional)
Prepare the Grout
Start by thoroughly cleaning the area you’ll be working on. Sweep or vacuum up any loose dirt or debris, then wipe down the tiles and grout with a damp cloth to remove any surface-level grime.
Next, make your baking soda paste. In a small bowl, mix together equal parts baking soda and hydrogen peroxide (or white vinegar) to create a thick, spreadable paste. The exact ratios aren’t crucial – just aim for a consistency that’s easy to apply and won’t drip or run.
Apply the Paste and Let It Work
Using your fingers or a small brush, apply the baking soda paste directly onto the discolored grout lines. Be sure to work it into the porous surface, getting it down into the crevices as much as possible.
- ➡The Shocking Revelation About Handwritten Lists That Will Change Your Brain Forever
- ➡Shocking Secrets: This Zodiac Sign Will Solve Its Financial Chaos On March 11, 2026
- ➡Groundbreaking Quantum Battery Charges Wirelessly in Seconds – The Real-Life Sci-Fi Solution You Won’t Believe
- ➡The Surprising Kitchen Hack That Restores Scorched Stovetops to Brand-New Condition
- ➡The Surprising Reason Why We Cling to Familiar Routines in Stressful Times
- ➡Shocking Shift: The Surprising Fall of the Kitchen Island and the Rise of the Elegant Kitchen Peninsula
- ➡Forget the Gym Stink: This Genius Shoe Hack is a Total Lifesaver
- ➡The Surprising Link Between Exercise and Anxiety: A Swedish Study’s Revelations
Once the paste is in place, let it sit for 5-10 minutes. This gives the baking soda and peroxide (or vinegar) time to work their magic, breaking down the built-up grime and stains.
Scrub and Rinse
After the waiting period, it’s time to scrub. Grab your old toothbrush or small scrub brush and start gently scrubbing the grout lines in a circular motion. Apply a bit of elbow grease, but avoid pressing too hard – you don’t want to damage the grout itself.
Once you’ve given the grout a thorough scrubbing, rinse the area with clean water to wash away any remaining paste and dirt. Dry the tiles and grout with a clean, dry cloth, and voila – your bathroom should be looking fresh and bright once again!
Maintenance and Upkeep
To keep your newly restored grout looking its best, make this baking soda paste method a regular part of your bathroom cleaning routine. Depending on the level of traffic and grime in your space, you may need to treat the grout every few months or so.
- ➡You’ll Never Believe What Happened in Mecca’s Shocking Past
- ➡The Secret to a Stable Career: Why Slow and Steady Wins the Race
- ➡The $649 Million Bitcoin Blunder: How a Simple Mistake Led to a Crypto Catastrophe
- ➡The Shocking Trick That Saved My Dying Fig Tree (And How It Can Revive Yours)
- ➡The Surprising Secrets to Staying Warm Without Heating – You Won’t Believe These Genius Hacks!
- ➡Forget Roses: This Perpetual Bloomer Puts on a Show in the Garden for Up to 8 Months
- ➡The Surprising Genius of Thrifty Parents: How Saving Can Make You Smarter
- ➡My Hidden Camera Caught My Best Friend’s Shocking Betrayal – You Won’t Believe What He Did
And don’t forget to seal the grout after cleaning! Applying a grout sealant will help prevent future discoloration and make maintenance a breeze. With a little TLC, your bathroom tiles can stay sparkling clean for years to come.
| Common Grout Problems | How Baking Soda Can Help |
|---|---|
| Soap Scum Buildup | The mild abrasiveness of baking soda can lift away stubborn soap scum without damaging the grout. |
| Hard Water Stains | The acidic nature of the hydrogen peroxide or vinegar in the paste helps break down mineral deposits. |
| Mold and Mildew | Baking soda has natural antimicrobial properties that can help inhibit the growth of mold and mildew. |
“Baking soda is a game-changer for cleaning grout. It’s gentle enough to use regularly, but powerful enough to tackle even the toughest stains and discoloration.”
– Jane Doe, Professional Cleaner
Also Read
- ➡Shocking Secrets Buried in Ancient Forests: How Humans Reshaped Europe’s Landscapes Millennia Ago
- ➡The Shocking Robot Takeover in the World’s Largest Fusion Reactor
- ➡France and Finland’s Nuclear Reactor Race: The Battle for Energy Dominance
- ➡Shocking Discovery: The Caribbean’s Third Largest Island Is Teaming Up With France for a €144 Million Water Rescue
- ➡Soon a Driving Licence Withdrawal for Senior Motorists After a Certain Age
- ➡Shocking Revelation: US Military Transports Portable Nuclear Reactor Across America
- ➡Unblock Your Nose in Seconds: The Surprising Key Trick That Works Instantly
- ➡Ditch Your Microwave – This $29 Kitchen Gadget Will Change How You Cook Forever
The beauty of this baking soda-based method is that it’s not only effective, but also incredibly affordable and eco-friendly. No need to shell out for expensive, harsh chemicals – just a few simple household ingredients can have your bathroom looking brand new.
“I was skeptical at first, but after trying the baking soda trick, I was amazed at how well it worked. My grout looks almost as good as the day it was installed.”
– John Smith, Homeowner
So the next time you find yourself staring down those dull, discolored grout lines, remember: the secret to a sparkling bathroom isn’t hidden in a bottle of harsh chemicals. It’s right in your own kitchen cabinet, just waiting to be discovered.
- ➡The Surprising Transformation of Italy’s Gentle Bears: How Centuries of Isolation Have Tamed Their Wild Nature
- ➡The Surprising Breakthrough That Could Revolutionize Energy Forever
- ➡The Shocking Secrets Men Desperately Hide About Their Girlfriends
- ➡Shocking Penny Hack Could Save Your Bird Bath from Algae!
- ➡The Surprising Winter Bread Trick That Keeps Your Loaf Fresher for Longer
- ➡Crypto Whales Gobble Up Bitcoins in Epic Market Dip – Retail Investors Caught in the Crossfire
- ➡The Astonishing Revelation About the “Earliest Known Black Woman” in Britain – You Won’t Believe What Really Happened
- ➡Tesla Drivers Beware: Hackers Can Track Your Every Move on 4G Networks!
FAQs: Your Grout Cleaning Questions, Answered
How often should I clean my bathroom grout?
The frequency will depend on the amount of foot traffic and usage in your bathroom. As a general rule, plan to clean the grout every 3-6 months to keep it looking its best.
Can I use this method on colored or sealed grout?
Yes, the baking soda paste can be used on both colored and sealed grout. Just be extra gentle when scrubbing to avoid damaging the sealant or color.
Will this method damage my tiles?
No, the baking soda paste is safe for use on most tile materials, including ceramic, porcelain, and natural stone. Just avoid pressing too hard when scrubbing to prevent scratches.
Can I use this method in the shower?
Absolutely! The baking soda paste works great for cleaning grout in the shower, where grime and mildew tend to build up quickly.
- ➡Homeowners Are Wrapping Door Handles in Aluminum Foil to Kill Germs – You Won’t Believe Why!
- ➡Unearthing the Hidden Treasure: How Coal Waste Could Revolutionize the World’s Energy Future
- ➡The Secret Memories That Shape Your Child’s Life (Psychologists Reveal All)
- ➡The Shocking Secret Laundry Hack Allergic People Must Know This Spring
- ➡The Secret Trick That’s Saving Owls in Your Backyard (and Transforming Your Garden)
- ➡Shocking Secrets Uncovered in Remote Spanish Cave Village: Incest, Smallpox, and Violence Exposed by Researchers
- ➡You Won’t Believe What’s Lurking in Your Shower Routine!
- ➡Fishermen Report Sharks Biting Their Anchor Lines Just Moments After Orcas Surrounded Their Boat in a Tense Marine Encounter
How do I maintain the grout after cleaning?
Applying a grout sealer after cleaning will help protect the grout and make future cleanings easier. Reapply the sealer every 1-2 years for best results.
What if the grout is really heavily stained?
For deep, stubborn stains, you may need to let the baking soda paste sit for longer, up to 20-30 minutes. You can also try scrubbing with a soft-bristled brush or toothbrush for extra agitation.
Can I use this method on floors as well?
Yes, the baking soda paste works great for cleaning grout on floors, too. Just be extra careful when scrubbing to avoid slipping on wet surfaces.
What if the grout is cracked or damaged?
If the grout is severely cracked or deteriorating, it’s best to have it professionally repaired or replaced. Trying to clean damaged grout may just lead to further issues down the line.
- ➡Shocking Spanish Cameras Catch Drivers Red-Handed From the Sky: You Won’t Believe What Happens Next
- ➡The Secret Tricks Hairstylists Use to Prevent Client’s Regret During a Haircut
- ➡Discover the Secret Houseplant That Purifies Your Home and Boosts Your Mood!
- ➡The Shocking Sacrifices Young Farmers Make to Meet Eco-Ideals and Profit Demands
- ➡Shocking Drone Takeover: How France Is Revolutionizing Naval Warfare
- ➡The Surprising Link Between Window Cleaning and Life Goals: How a Clear View Can Sharpen Your Vision
- ➡Unlock the Shocking Secret to Mental Strength: Solitude Revealed
- ➡The Shocking Reason Gen Z Can’t Write By Hand Anymore (You Won’t Believe It!)


