You just finished mopping the floors, and the house smells fresh and clean. But within a day or two, that sparkling cleanliness has vanished, and your floors are once again covered in dirt and grime. What gives? The reason may surprise you – and fortunately, there’s a simple fix.
It turns out that a common mopping mistake could be the culprit behind your floors’ rapid re-dirtying. By understanding where you might be going wrong, you can keep your home looking its best for longer.
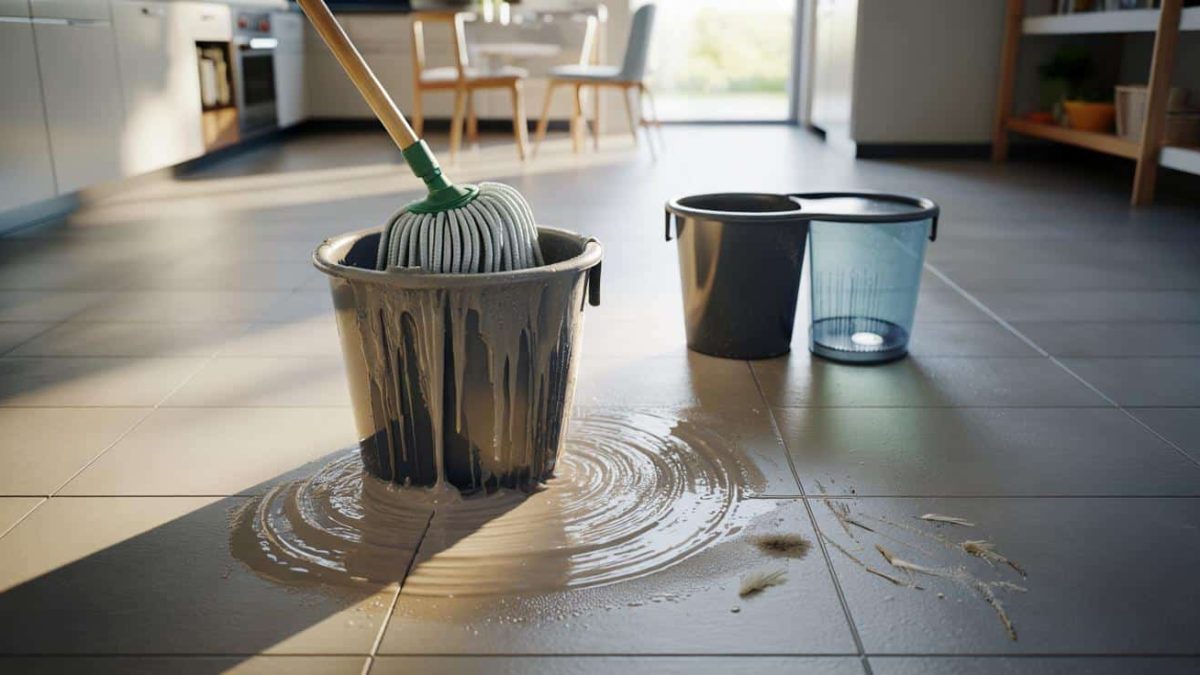
The Invisible Mopping Error That’s Ruining Your Floors
The key mistake many people make when mopping is not properly rinsing out their mop. When you wring out a dirty mop, you’re not actually removing all the grime – you’re just spreading it around. That means with each pass of the mop, you’re laying down a fresh layer of dirt and debris.
This problem is especially prevalent when using a traditional string mop. The mop head acts like a sponge, soaking up dirty water and then depositing it across the floor as you clean. Unless you thoroughly rinse the mop head after each use, you’re essentially mopping with dirty water.
- ➡Shocking Experiment: AI Bosses Utterly Fail at Running a Real Company
- ➡The Shocking Way Pregnancy Changes a Mother’s Brain Forever
- ➡Voyager 1’s 50-Year Journey: Triumph or Vanity Project?
- ➡The Hidden Savings Secret That Can Turn Your Irregular Income Into Financial Freedom
- ➡Revealed: This Secret Mediterranean Island Looks Almost Tropical
- ➡Shocking Discovery: The Unusual Container That’s Transforming People’s Finances (You Won’t Believe the Results)
- ➡The Shocking Secret Killing Your Lawn (and How to Revive It This Spring)
- ➡Revealed: The Colossal Airbus Factory Where 30,000 People Build Jets Non-Stop
The result? Your floors may look clean immediately after mopping, but that cleanliness is short-lived as the dirt and debris you spread around starts to show again.
Why Rinsing Your Mop Head Matters More Than You Think
Properly rinsing your mop head isn’t just about aesthetics – it’s a crucial step for maintaining long-lasting cleanliness. When you leave dirt and grime in the mop head, you’re creating a breeding ground for bacteria and odors.
| What Happens When You Don’t Rinse | The Benefits of Rinsing Thoroughly |
|---|---|
| – Dirt and debris get spread around the floor – Bacteria and mold can grow in the mop head – Floors get dirty again quickly |
– Removes all dirt and grime from the mop – Prevents the spread of bacteria and odors – Keeps floors cleaner for longer |
Taking the extra time to thoroughly rinse your mop head after each use is a simple but essential step. It ensures that you’re not just pushing dirt and germs around, but actually removing them from your floors.
- ➡The Shocking Truth Behind the US Nuclear Sub in Iceland – You Won’t Believe What Happened Next!
- ➡The Chilling Truth: Why Your Home Feels Cold, Even with the Heat On
- ➡The Surprising Reason Skipping Breakfast Could Be Ruining Your Productivity (and What Experts Say You Should Do About It)
- ➡This Retired Couple Rakes in Over $1,600 a Month – Without Working a Single Day in Their Lives!
- ➡This Daily Habit Is Secretly Sabotaging Your Finances (Nobody Tells You This!)
- ➡Hungary Detains Ukrainians Carrying $82 Million in Cash and Gold; Kyiv Calls It a Hostage-Taking
- ➡You Won’t Believe What Happens When You Boil Orange Peels in Your Home
- ➡The Shocking Handwriting Trick That Can Defy Aging for Seniors
The Best Way to Rinse and Maintain Your Mop
To keep your floors looking their best, make rinsing your mop a standard part of your cleaning routine. After mopping, take the mop head to the sink or tub and run it under hot, clean water until the water runs clear. Wring it out completely before storing the mop.
You can also try swapping out your traditional string mop for a microfiber mop, which is better at trapping and removing dirt. Microfiber mops tend to be less absorbent, so there’s less risk of spreading dirty water around.
Additionally, be sure to clean your mop head regularly – either by machine washing it or soaking it in a disinfecting solution. This will help prevent the buildup of bacteria, mold, and odors that can contribute to dirty floors.
The Hidden Dangers of Dirty Mop Heads
| Potential Risks of Unclean Mops | How to Mitigate the Risks |
|---|---|
| – Spreading bacteria and germs – Triggering allergies or respiratory issues – Contributing to the growth of mold and mildew |
– Rinse mop thoroughly after each use – Clean mop head regularly (machine wash or disinfect) – Consider switching to a microfiber mop |
- ➡The Shocking Charging Mistake That Could Cost You Hundreds (Don’t Plug In Before Reading This)
- ➡The Shocking Lawn Hack That Banishes Moss and Brings Your Grass Back to Life
- ➡The Shocking Secret My Grandmother Revealed on Her Deathbed – And Why It Explains My Father’s Mysterious Disappearance
- ➡The Unbreakable Strength You Gain Before 50: 9 Life-Defining Trials That Will Shock You
- ➡The Shocking Truth About Losing Your Senses at 63 – What Nobody Told You
- ➡The Shocking Collapse of Sustainable Farming: How Green Initiatives Are Betraying the Next Generation of Farmers
- ➡The Surprising Household Item That Transforms Wet Floors and Cluttered Entryways
- ➡The Cosmic Code Cracked: Humanity’s Startling Discovery from the Primordial Universe
“A dirty mop is basically just redistributing dirt and bacteria around your home. Taking the time to properly clean and maintain your mopping tools is crucial for keeping your floors and living space truly hygienic.” – Cleaning Expert, Sarah Johnson
Don’t let a simple mopping mistake undo all your hard work. By rinsing your mop head thoroughly and keeping it clean, you can enjoy sparkling floors for much longer.
The Surprising Reason Your Floors Look Dirtier After Mopping
It’s a common frustration: you finish mopping your floors, only to find that they look even dirtier just a day or two later. The culprit, as we’ve explored, is often an unclean mop head that’s spreading grime rather than removing it.
But there’s another factor that can contribute to floors getting dirty faster after mopping – the type of cleaning solution you use. Many commercial floor cleaners actually leave behind a residue that attracts and holds onto dirt.
- ➡The Secret Pasta Hack That’s Turning Weeknight Dinners Upside Down
- ➡The €4.1 Billion Rafale Deal That Vanished: How France’s Fighter Jet Dreams Crashed and Burned
- ➡Are You a Fast Walker? The Shockingly Unexpected Psychological Traits You Might Have, Revealed by Science
- ➡The Shocking Soil Rest Hack That’s Transforming Backyards (and You Probably Have It All Wrong)
- ➡The Incredible True Story of How a Furry Hero Saved His Owner’s Life
- ➡Shocking Truth: The Zero-Oil Secret That’s Obliterating Air Fryers
- ➡The Hidden Strength of Those Who Remain Kind After Hardship
- ➡The Dark Reality of Pet Abandonment: A Caretaker’s Heartbreaking Exposé
This residue acts like a magnet, drawing in dust, debris, and other particles that make your floors look grimy again in no time. To combat this, try switching to a more natural, residue-free cleaner – or even just using plain water and vinegar.
“Many store-bought floor cleaners contain chemicals and surfactants that can leave behind a sticky film. This film acts like a dirt magnet, so your floors get dirty again much faster. Opt for simpler, gentler cleaning solutions instead.” – Cleaning Specialist, Emily Watkins
How to Make Your Mopping Last Longer
In addition to rinsing your mop and using the right cleaning solution, there are a few other tips that can help extend the life of your freshly mopped floors:
| Tip | Benefit |
|---|---|
| Sweep or vacuum first | Removes loose dirt and debris before mopping |
| Spot clean high-traffic areas | Targets problem spots to prevent rapid re-soiling |
| Mop in sections | Allows you to thoroughly rinse the mop between areas |
| Use protective mats | Placed in entryways, they catch dirt before it hits the floor |
- ➡Shocking Military Secrets: The Radical Divide Between Germany and France’s Defense Strategies
- ➡Shocking New Swiss Tech Could Revolutionize Renewable Energy Forever!
- ➡Shocking Trick Unlocks the Secret to Perfect Pasta Bakes Every Time!
- ➡Ditch the Belly Fat: This €60 Decathlon Device Makes Ab Workouts Actually Tolerable
- ➡Shocking Habits of Polite People That Prove They’re Trustworthy
- ➡Shocking Aussie Hack Eliminates Roaming Fees and Keeps You Connected Anywhere!
- ➡Shocking Heating Mistakes That Are Wasting Your Money This Winter
- ➡The Shocking Reason Why Highly Sensitive People Can’t Ignore Small Mood Shifts
By combining these smart mopping habits with proper mop maintenance, you can keep your floors looking clean and fresh for much longer.
The Real Reason Your Floors Are Always Dirty (And How to Fix It)
At the end of the day, the key to maintaining clean floors isn’t just about how you mop – it’s about understanding the underlying causes of dirt and grime buildup. From improper mop care to the use of harsh cleaning products, there are several factors that can contribute to your floors looking dingy again shortly after cleaning.
“Keeping floors consistently clean requires a multi-faceted approach. It’s not enough to just mop regularly – you have to pair that with good mop hygiene, the right cleaning solutions, and smart prevention strategies. That’s the only way to beat the cycle of constant re-dirtying.” – Home Cleaning Expert, Jessica Rae
By addressing these root causes, you can enjoy the satisfaction of sparkling floors that stay that way for much longer. With a little extra care and the right techniques, you can finally break the frustrating pattern of mopping in vain.
- ➡The Incredible Power of a No-Buy Month: How I Transformed My Spending Habits and Built Substantial Savings
- ➡The “Secret Inventory” That Could Slash Your Inheritance Tax Bill in Half
- ➡Psychology Says People Who Can’t Stop Worrying Actually Have Superior Intelligence
- ➡The Shocking Truth Behind the Chicken and Egg Debate Revealed: Who Really Came First
- ➡The Shocking Moment the Olympic Flame Passed to France: What You Need to Know
- ➡The Shocking Truth Behind a 4-Year-Old’s Claim to Be “Before” an Old 1943 Photo
- ➡You Won’t Believe What These Engineers Discovered Deep Beneath the Oceans!
- ➡Shocking Secrets Uncovered: Retirement-Age Workers Defy All Expectations
FAQs: Keeping Your Floors Clean for Longer
How often should I mop my floors?
The recommended frequency for mopping floors can vary, but in general, most homes should mop at least once a week. High-traffic areas may need more frequent cleaning.
What’s the best way to clean a mop head?
For string mops, thoroughly rinse under hot water after each use until the water runs clear. For microfiber mops, machine wash on a hot cycle or soak in a disinfecting solution.
Can I use vinegar to mop my floors?
Yes, a vinegar-based cleaning solution can be an effective, residue-free way to mop floors. Just be sure to dilute the vinegar with water to avoid damage.
How do I prevent dirt from being tracked in?
Place doorway mats at all entrances to catch dirt and debris before it reaches your floors. Encourage family members to remove shoes when coming inside.
- ➡The New Inheritance Law That Will Upend Generations of Tradition
- ➡The Surprising Kitchen Hack That Restores Scorched Stovetops to Brand-New Condition
- ➡The Shocking Reason Drivers Are Covering Their Side Mirrors with Plastic Bags
- ➡The Big Chill: Shocking New Winter Storm Headed for Europe in February
- ➡Unearthing the Titans of Earth’s Ancient Past: Prototaxites, the Colossal Fungi that Ruled a Treeless World
- ➡Kelsey Grammer, 70, Welcomes 8th Child: The Surprising Story Behind His Growing Family
- ➡Shocking Discovery! 17th-Century Royal Letter Confirms Nubian King Qashqash in Sudan
- ➡The Unexpected Rise of Madrid as Europe’s Next Trendsetting Capital
Should I sweep or vacuum before mopping?
Yes, sweeping or vacuuming first helps remove any loose dirt and debris that could get spread around by the mop.
How do I clean up spills quickly?
Blot up spills immediately with a clean, absorbent cloth or paper towels. This prevents the spill from soaking into the floor and causing stains.
What’s the best way to mop floors in sections?
Divide your floor space into manageable sections and mop one at a time, thoroughly rinsing your mop head between each area.
How do I know when it’s time to replace my mop?
If your mop head is frayed, discolored, or no longer effectively trapping dirt, it’s probably time for a replacement. Aim to get a new mop every 6-12 months.
- ➡The Shocking Secret Retirement Truth You Were Never Told
- ➡Shocking Discovery: Common Mouth Bacteria Could Be the Cause of Parkinson’s Disease
- ➡Shocking 3D Scans Reveal the Wreckage of the Legendary USS Monitor Like Never Before
- ➡The Shocking Secrets Hiding in Your Second-Hand Clothes – You’ll Never Shop Thrift the Same Way Again!
- ➡You Won’t Believe What Happened During the Century’s Longest Solar Eclipse!
- ➡Shocking Secret to Looking 10 Years Younger: The Vintage Dress That’s Making a Huge Comeback
- ➡The Secret Certificate That Could Unlock Bigger Pensions for Retirees (You Won’t Believe Who’s Being Left Behind)
- ➡Forget Weeding and Watering: The Incredible Perennial Veggies That Grow Themselves


