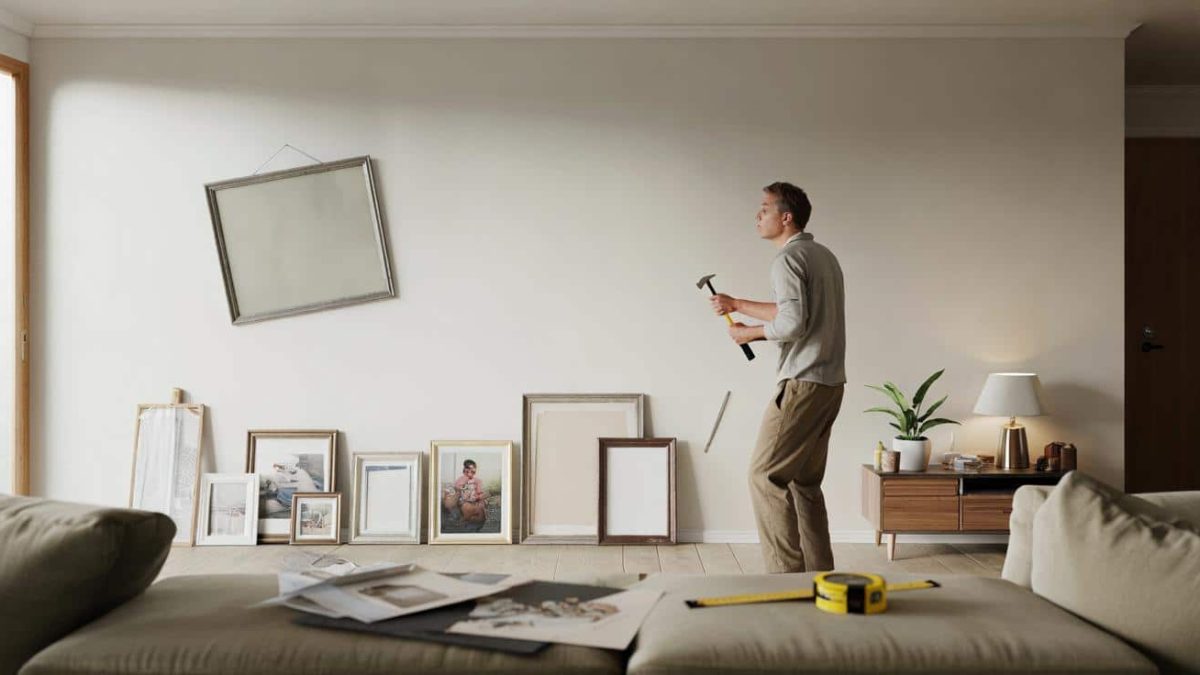
We’ve all been there – you have a brand new print fresh from the frame shop, the glass is still sparkling clean, and the edges are crisp. You’re excited to get it up on the wall and showcase your new artwork. But before you start hammering away, there are some crucial mistakes you might be making that could cost you time, money, and a lot of headaches down the line.
The biggest pitfalls don’t actually happen when the nail hits the wall, but rather in the planning stages. That’s where most people go wrong, even if they’ve hung countless pictures before. The reality is, there’s a lot more to properly securing artwork than meets the eye. From understanding weight capacities to anticipating potential issues, a little forethought can save you from major DIY disasters.
Underestimating the Weight of Your Artwork
One of the most common mistakes when hanging pictures is not properly accounting for the full weight of the frame, glass, and artwork. It’s easy to look at a piece and think “that doesn’t look too heavy” – but the reality is, those materials add up quickly. If you’re not using the right anchors and hardware, you could end up with a big crash on your hands.
Even a simple 8×10 framed print can weigh several pounds, and larger pieces can easily reach 20 or 30 pounds. Trying to support that kind of weight with a basic nail or tiny drywall anchor is a recipe for disaster. Before you start drilling, make sure you know the total weight of what you’re hanging and choose the appropriate hardware to handle the load.
- ➡The Real Reason Crocodiles Refuse to Eat Capybaras (It’ll Shock You!)
- ➡Shocking Leak: The U.S. Navy’s $13 Billion Warship Cover-Up Exposed
- ➡Shocking Footage Shows Dog Sitter Betraying Owner’s Trust: The Alarming Secrets Uncovered
- ➡Revealed: The French Aviation Giant Investing €70M to Become a Rafale Powerhouse in Burgundy
- ➡Shocking Discovery: NASA Picks Up a Cosmic Whisper from the Dawn of Time
- ➡The Shocking Reason Why Fast Walkers Are Actually More Anxious (Not Healthier!)
- ➡The Surprising Kitchen Hack That Restores Scorched Stovetops to Brand-New Condition
- ➡Shocking Gas Station Revelation: Mandatory New Fuel Price Info You Need to Know
This is especially important if you’re hanging artwork on drywall, which has a much lower weight capacity than wood studs. Drywall alone often can’t support heavy frames, so you’ll need to locate the studs behind it and secure your hardware there instead.
Ignoring the Condition of Your Walls
Another factor that’s easy to overlook is the actual condition of the wall surface you’re working with. Is it freshly painted drywall? Old plaster? Crumbly brick? Each material requires a different approach to ensure a sturdy, long-lasting hang.
Drywall, for example, can be tricky because the material is relatively soft and prone to cracks or crumbling around screws or anchors. Even a solid drywall anchor may not hold up if the wall isn’t in good shape. On the other hand, brick or concrete walls offer a much sturdier foundation, but you’ll need specialized masonry tools and anchors to get the job done right.
Taking the time to thoroughly inspect your walls and choose the appropriate hardware can mean the difference between a picture that stays put for years, versus one that ends up on the floor a few months down the line.
- ➡The Fiery Bloom That Transforms Dull Borders into Stunning Masterpieces (You Have to See It to Believe It)
- ➡Bacterial Superbombs: The Secret Weapon Obliterating Tumors From Within
- ➡The Shocking Truth About the Mysterious Giant Spiders Overrunning the UK
- ➡The Surprising Cleaning Superpower Hiding in Your Kitchen
- ➡China’s Bold Plan to Tackle the Alzheimer’s Epidemic: A Groundbreaking National Strategy
- ➡Prepare to Be Stunned: The Jaw-Dropping Reason Ice Is Shockingly Slippery (You’ve Been Lied To)
- ➡The Shocking Truth About Rheumatoid Arthritis: Researchers Race to Rewrite the Rules of an “Incurable” Disease
- ➡The Hidden Power of Your Social Circle: How the People Around You Shape Your Personality in Unexpected Ways
Rushing the Measuring and Leveling Process
It may seem like a minor step, but accurately measuring and leveling your artwork is crucial for a professional-looking install. It’s tempting to just eyeball the placement and start hammering, but that’s a surefire way to end up with crooked, uneven frames that drive you crazy every time you look at them.
Taking the extra time to carefully measure, mark, and level your picture hangers will pay off in the long run. Use a laser level or plumb line to ensure your marks are perfectly straight, and double-check your measurements before putting any holes in the wall. A little extra effort upfront can save you from having to patch drywall and start over later.
Remember, the way you hang your artwork says a lot about your attention to detail and commitment to a polished, cohesive look. Rushing through this step might save you a few minutes, but the end result will look sloppy and amateurish.
Ignoring Potential Future Access
When securing artwork to the wall, it’s important to think about more than just the immediate install. You also need to consider potential future access or adjustments that might be required.
- ➡Unlock the Secrets of Sweden’s Enchanting Autumn: Colors, Mist, and Tranquility
- ➡You Won’t Believe the Rare Celestial Event Happening This Century!
- ➡You Won’t Believe What’s Causing This Unprecedented March Madness Polar Vortex Anomaly
- ➡The Controversial Tree That’s Getting Banned Across Cities – And the Shocking $1,000 Fines You Need to Know About
- ➡Shocking New Blood Pressure Guidelines Spark Cardiologist Concerns
- ➡Shocking US Discovery Could Supercharge Hydrogen Production – You Won’t Believe What Happened Next!
- ➡The Surprising Trick That’s Transforming Office Salaries (You Won’t Believe This!)
- ➡The Unsung Feathered Guardians Protecting Our Backyards from the Deadly Asian Hornet Invasion
For example, if the artwork is over an electrical outlet or switch, you’ll want to make sure you can still easily access it for maintenance or repairs down the line. The same goes for artwork hung above furniture or cabinetry – you need to be able to get behind it if necessary without having to move heavy pieces around.
Another key factor is whether you might need to periodically adjust the artwork, like if it gets bumped out of alignment or you decide to rearrange your space. Opting for picture-hanging hardware that allows for easy sliding or tilting adjustments can save you a lot of hassle compared to more permanent mounting methods.
Overlooking Potential Damage to Walls
Finally, one of the biggest oversights when hanging artwork is not considering the potential damage to your walls. Even the most careful installation can leave marks, holes, or other unsightly blemishes that are difficult to repair.
This is especially true if you need to move the artwork later on and are left with a mess of old nail holes or anchor points. Taking the time to use the right hardware, fill holes properly, and touch up paint can mean the difference between a seamless, professional look and a DIY disaster zone.
- ➡The Billion-Euro Nuclear Deal Reshaping Europe’s Energy Future
- ➡The Secret to Quenching Hyderabad’s Thirst: How Veolia’s Record-Breaking Water Contract is Transforming India’s Second-Largest City
- ➡The Secret Tricks to Rocking Gray Hair (Without Looking Like a Grandma)
- ➡The Shocking Truth About ETFs vs. Active Funds: Why Passive Investing Beats the Market Every Time
- ➡The Shocking Collapse of France’s Rafale Fighter Jet Deal: An Untold Story of Billions Lost
- ➡The Shocking Truth: Night Owls Actually Live Longer Than Early Birds!
- ➡The Astonishing Revelation About the “Earliest Known Black Woman” in Britain – You Won’t Believe What Really Happened
- ➡The Shocking Simple Trick to Remove Limescale From Your Kettle (No Vinegar or Soap Needed)
Investing in a few simple tools like a stud finder, level, and putty knife can go a long way in protecting your walls and ensuring a clean, damage-free install. It’s a small price to pay for artwork that will look great for years to come.
The Bottom Line
Hanging artwork on your walls may seem like a simple task, but there’s a lot more to it than meets the eye. From understanding weight capacities to anticipating potential access and damage issues, a little extra planning and attention to detail can make all the difference.
By avoiding these common mistakes, you can ensure your new prints and paintings stay securely in place, look perfectly level and aligned, and don’t leave a trail of unsightly damage behind. It may take a bit more time upfront, but the end result will be a beautifully curated wall display that you can enjoy for years to come.
FAQ
How do I determine the weight capacity of my walls?
The weight capacity of your walls will depend on the materials used – drywall, plaster, brick, etc. – as well as whether you’re able to secure the hardware into wall studs. Using a stud finder and selecting the appropriate anchors or screws for the wall type is crucial. When in doubt, err on the side of heavier-duty hardware to be safe.
- ➡Shocking Fuel Mix-Up Leaves Dozens Stranded: What Really Happened?
- ➡You Won’t Believe What Doctors Are Clashing Over: The Shocking Truth About Baking Soda Under the Bed
- ➡Shocking Discovery: The Enormous Harpy Eagle Chick That’s Giving Brazil Hope
- ➡The Real Reason Norwegians Ignore Garden Birds (And Why You Shouldn’t)
- ➡Shocking Revelation: Airbus’ Secret Plan to Dominate the Sky with Their “Super A220”
- ➡The Miracle Baking Soda Eye Lift: Doctors Warn Against This Viral Trend
- ➡The Surprising Truth Behind Why Criticism Haunts You for Days
- ➡Fusion Power Breakthrough: Canada’s Secret Fusion Startup Races to the Stock Market
What’s the best way to mark and level picture hangers?
For the most accurate and level results, use a laser level or plumb line to mark your hanging points. Measure the distance between the hangers on the back of the frame, then transfer those measurements to the wall. Double-check that your marks are perfectly straight before drilling any holes.
How do I avoid damaging my walls when moving artwork?
To minimize wall damage, use picture-hanging hardware that allows for easy sliding or tilting adjustments, rather than permanent mounting methods. When it’s time to move the artwork, carefully remove the hardware and use a putty knife to fill any remaining nail or anchor holes. Then touch up the paint to blend it in seamlessly.
What’s the best way to secure heavy artwork on drywall?
For heavy frames on drywall, it’s crucial to locate and secure the artwork to wall studs rather than relying on drywall anchors alone. Use a stud finder to mark the stud locations, then position your hangers accordingly. You may also want to consider using toggle bolts or other heavy-duty drywall anchors for extra support.
How do I know if my walls are in good enough condition to hang artwork?
Inspect your walls closely for any cracks, crumbling, or other signs of damage or instability. Older plaster walls, in particular, can be tricky. When in doubt, it’s best to consult a professional to assess the condition and recommend the appropriate hardware and techniques for a secure, long-lasting installation.
- ➡China’s Secret Rice Stockpile: What The World Doesn’t Know
- ➡Shocking Secrets the Navy Doesn’t Want You to Know About the Mighty USS Ford Carrier Group
- ➡More People Are Putting Aluminum Foil on Door Handles – Here’s Why
- ➡The Shocking Reason You Should Never Put Undiluted Windshield Cleaner in Your Reservoir
- ➡Shocking Drone Takeover: France Leaps to Global Drone Dominance with Groundbreaking Airbus Deal
- ➡Shocking Discovery: The Alarming Reason Why the Atlantic Ocean Is Rapidly Overheating
- ➡The Surprising Difference Between “Porc” and “Cochon” in French Cuisine
- ➡The Shocking Flower That Reveals When You Should Never Mow Your Lawn Again
What’s the best way to hide wires or cords behind hung artwork?
For a clean, seamless look, try running cords or wires through the wall behind the artwork. You can use in-wall cable channels or just drill a small hole to feed the cables through. Just be sure not to accidentally hit any electrical lines or pipes in the process.
How do I properly measure and space multiple pieces of artwork?
When hanging a gallery wall or multiple frames, measure the total width of the arrangement and divide by the number of pieces to get the ideal spacing. Make sure to account for the width of each frame as well. Use a laser level to ensure everything is perfectly aligned, and leave 2-4 inches of space between each piece for a cohesive, professional look.
What are some tips for hanging artwork above furniture?
When hanging artwork over furniture like a couch or credenza, leave 6-8 inches of space between the top of the furniture and the bottom of the frame. This creates a balanced, proportional look. Also, make sure you can easily access the wall behind the furniture in case you need to adjust or remove the artwork later on.


