The aroma hit you first. Warm, fruity, a hint of childhood and a touch of Sunday morning, while the rain still fell outside. It’s the unmistakable scent of homemade jam – the kind your grandma used to make. But what if we told you that you could recreate that nostalgic flavor without using any special ingredients or equipment? Say goodbye to store-bought jams and hello to a simple kitchen trick that will have you whipping up the most luscious, spreadable fruit preserves in no time.
For years, we’ve been conditioned to believe that making jam at home requires specialized tools and hard-to-find additives like pectin or gelatin. But the truth is, with a little patience and the right technique, you can transform the most ordinary fruits into a silky-smooth, spoon-able delight – no gelling agents required. Prepare to have your mind (and your taste buds) blown.
The Secret Ingredient That Makes Homemade Jam Irresistible
The key to achieving that perfect jam consistency without relying on pectin or sugar? Time. By slowly simmering your fruit down over low heat, you allow the natural pectin and sugars to concentrate, resulting in a thick, velvety spread that’s bursting with flavor. No more watery, runny jams or overly sweet preserves – just pure, unadulterated fruit in all its glory.
This method takes a little more patience than the quick-cook pectin route, but the results are well worth it. Not only will you end up with a healthier, more natural jam, but the process itself is incredibly therapeutic. There’s something almost meditative about standing at the stove, stirring your fruit as it transforms into a rich, glossy preserve.
- ➡The Shocking Truth: Is a Vegetarian Diet Actually Healthy?
- ➡The Secret AI Weapon That Could Reshape Naval Warfare
- ➡The Secret Ingredient That Makes This Apple Cake Irresistibly Soft
- ➡Unlock Your Skin’s Healing Potential with This Miraculous Thermal Balm
- ➡Shocking Trend: How the Short Bob is Dominating Celebrity Looks in 2026
- ➡The Terrifying Truth About Deepfakes: Experts Reveal an Unstoppable Wave of Digital Deception
- ➡The Shocking Truth About Vitamin B7 and Cancer Cells
- ➡The Radical Shift in Prostate Cancer Treatment: How New Innovations are Poised to Transform the Landscape
Plus, with this technique, the flavor possibilities are endless. From classic strawberry and raspberry to more exotic options like mango or passionfruit, the only limit is your imagination (and the selection at your local farmers’ market).
The Secret to Silky-Smooth Jam Without Gelatin
The secret to achieving that coveted “spoon-able” texture without relying on pectin or gelatin? It’s all about the cooking method. Instead of quickly boiling the fruit and sugar together, you’ll want to take it slow and steady, simmering the mixture over low heat for an extended period of time.
This gentle heating process allows the natural pectin in the fruit to break down and release, gradually thickening the jam without the need for any additional gelling agents. The longer you cook it, the more the fruit’s juices will concentrate and the mixture will transform into a luxuriously thick, spreadable consistency.
But don’t worry, you won’t need to spend hours slaving over the stove. With a little planning and the right technique, you can achieve homemade jam perfection in under an hour. The key is to let the mixture simmer away, stirring occasionally, until it reaches your desired texture. No more guesswork or frustrating batches that just won’t set!
- ➡You Won’t Believe Why Some Plants Grow Faster in Spring Than Others
- ➡Unveiling the Spine-Chilling Secrets of France’s Covert Naval Juggernaut: The Suffren Submarine Exposed!
- ➡The Secret Drone Hacks Eroding Politicians Don’t Want You to Know
- ➡Shocking Discovery: The One Move That Could Save You From a Bedbug Nightmare
- ➡Hairstyles That Lift Your Face After 50: The Anti-Aging Secret You Need to Know
- ➡The Unexpected Life Changes Awaiting 4 Zodiac Signs This October
- ➡Shocking Revelations: Chimpanzees’ Secret Alcohol Habits Exposed
- ➡The Shocking Secret About Disappearing Frogs That Could Change Your Life
The Surprising Health Benefits of Homemade Jam
While store-bought jams may be convenient, they often come loaded with added sugars, preservatives, and other questionable ingredients. But when you make your own jam at home, you’re in complete control of the recipe – and that means a healthier, more wholesome end product.
By simmering the fruit down slowly without any gelling agents, you’re able to concentrate the natural sugars and preserve the fruit’s essential vitamins and antioxidants. Plus, you can adjust the sweetness to your own taste, using just enough to balance the tartness of the fruit.
And let’s not forget the mental health benefits of making your own jam. There’s something incredibly soothing and satisfying about the process, from selecting the freshest seasonal produce to watching the mixture transform into a glossy, jewel-toned preserve. It’s a simple pleasure that can add a touch of homemade comfort to your day.
The Unexpected Ingredient That Takes Homemade Jam to the Next Level
While the slow-cooking method is the key to achieving that dreamy, spoon-able jam texture, there’s one secret ingredient that can take your homemade preserves to the next level: a splash of lemon juice.
- ➡Shocking Secrets of Paris’ Revolutionary Transportation Plans: Mega-Metro, Floating Gondolas, and Flying Taxis Unveiled!
- ➡The Shocking Truth: Your Sponge Is Way Dirtier Than Your Toilet
- ➡You Won’t Believe When the Longest Solar Eclipse of the Century is Happening!
- ➡The Last Resort: Tuvalu’s Desperate Struggle Against Rising Seas
- ➡The Shocking Truth About Banned Garden Decor That Could Cost You Big
- ➡Shocking Discovery: Danville PD Warns of Dangerous Armed Subjects on the Loose
- ➡Unlock the Secret to Creamy, Eggless Tiramisu in Just 10 Minutes!
- ➡The Shocking Truth About France’s Vanishing Farms: Why Nobody Wants to Take Over the Family Business
Not only does the acidity from the lemon help to balance the sweetness of the fruit, but it also helps to activate the natural pectin, resulting in a thicker, more stable jam. Plus, the bright, citrusy notes perfectly complement the deep, fruity flavors of the preserve.
A little bit of lemon juice goes a long way, so start with just a tablespoon or two and adjust to taste. You’ll be amazed at how a simple squeeze can transform your jam from good to downright gourmet.
How to Make Homemade Jam That Lasts for Months
One of the best things about making your own jam is that it can last for months, allowing you to enjoy the fresh, fruity flavor year-round. But to ensure your preserves stay shelf-stable and delicious, there are a few key steps to follow.
First and foremost, be sure to sterilize your jars and lids before canning. This will help prevent any unwanted bacteria from infiltrating your jam and ruining your hard work. You can do this by boiling the jars and lids in water for at least 10 minutes, or by running them through the dishwasher on the sanitize cycle.
- ➡The Secret Grocery Habit That’s Draining Your Wallet (You’ll Never Guess!)
- ➡Unlock Your Emotional Secrets: The Simple Trick That Will Change Your Life (You Won’t Believe It!)
- ➡Shocking Discovery: Engineers Unveil Plans for Continent-Connecting Underwater Rail Line in the Deep Sea
- ➡The Shocking Truth Behind the Retirement of Rock’s Greatest Icon: What No One Saw Coming
- ➡Shocking Discovery: Giant Iron Monolith Beneath Hawaii May Explain Volcanic Hotspots
- ➡Shocking New Scam Targets Thousands of German Citizens: The Truth About “Smishing” Attacks
- ➡Discover the Bedroom Hack That’s Transforming Sleep for Thousands (Try It Tonight!)
- ➡Kate Middleton’s Shocking State Banquet Dress Leaves Jaws Dropped
Once your jam is cooked and ready to be jarred, make sure to fill the jars leaving just a bit of headspace at the top. This allows for proper sealing and helps to create an airtight environment that will keep your jam fresh for months. Finally, be sure to store your sealed jars in a cool, dark place, such as a pantry or cellar, to prolong their shelf life.
The Surprising Ways to Use Homemade Jam (That Aren’t Just Toast)
Sure, slathering homemade jam on freshly baked bread is a time-honored classic. But why limit your delicious preserves to just breakfast? With their rich, concentrated flavors, homemade jams can be used in all sorts of unexpected ways to elevate your everyday meals.
For a quick and easy appetizer, try pairing your jam with creamy brie or goat cheese and serve it with crackers or crostini. The sweet-and-savory combination is simply irresistible. Or, use your jam as a glaze for roasted meats, like pork tenderloin or chicken. The fruity notes will perfectly complement the savory flavors.
Looking for a unique twist on your usual PB&J? Swap out the jelly for your homemade jam and enjoy a gourmet take on a childhood favorite. You can even use it to fill homemade thumbprint cookies or swirl it into yogurt or oatmeal for a delicious breakfast treat.
- ➡Unveiling the Colossal Airship Factory: Where 30,000 Employees Construct 8 Jets Simultaneously
- ➡Are You a Dog Person? What Your Greeting Style Reveals About Your Personality
- ➡The Shocking Truth About Weeding Too Early: Why It Makes Everything Worse
- ➡Shocking Fireball Crashes Through French Roof, Sending Locals Scrambling for Meteorite Fragments!
- ➡China’s Turboprop Takeoff: Aviation Revolution or Noise Nightmare?
- ➡Shocking Shift in Arctic Stability Could Unleash Devastating Global Weather Chaos, Experts Warn
- ➡Shocking Knee Breakthrough: The Brutal Workout That’s Curing Pain Faster Than Pilates and Swimming
- ➡The Shocking Truth About the EU’s Caffeine Reclassification: A Wake-Up Call for Coffee Lovers
| Fruit | Recommended Uses |
|---|---|
| Strawberry | – Spread on toast or scones – Dollop on vanilla ice cream – Fill layer cakes or cupcakes |
| Raspberry | – Swirl into yogurt or oatmeal – Use as a topping for cheesecake – Mix into cocktails or mocktails |
| Mango | – Glaze grilled chicken or pork – Pair with brie or goat cheese – Spread on croissants or waffles |
“Homemade jam is such a versatile ingredient that can be used in so many creative ways beyond just toast,” says food blogger and recipe developer Emily Thompson. “The possibilities are truly endless, and it’s a great way to make any dish feel a little bit more special and elevated.”
“The beauty of making your own jam is that you can control the ingredients and customize the flavors to your liking. It’s a simple pleasure that can add so much joy and comfort to your day-to-day life.”
– Sarah Jenks, author and founder of the “Live More, Weigh Less” program
Also Read
- ➡You Won’t Believe What This Meteorite Just Did in the Sky!
- ➡The Dirty Truth About Your Radiator: The Hidden Dust Trap Plaguing Your Home
- ➡The Shocking Secret to Unclog Your Drain with Salt and Hot Water
- ➡The Subway Note That Changed My Life Forever
- ➡The Shocking Truth About Retired Laptop Batteries Powering a Self-Reliant Home for 10 Years
- ➡The Shocking Truth About the Polar Vortex Disruption That Could Chill the Entire Country
- ➡The Surprising Reason Why Drivers Who Clutch and Shift at Red Lights Are Actually Saving Their Cars
- ➡Unlock the Secret to Transforming Your Sunny Corner into a Butterfly Oasis
So what are you waiting for? Gather up some fresh, seasonal produce and get ready to experience the magic of homemade jam. Trust us, once you try this easy, no-fuss method, you’ll never go back to the store-bought stuff.
FAQs: Your Homemade Jam Questions Answered
How long does homemade jam last?
Properly sealed and stored, homemade jam can last for 6-12 months. Be sure to store jars in a cool, dark place like a pantry or cellar.
Can I use frozen fruit to make jam?
Absolutely! Frozen fruit works great for making homemade jam. Just thaw it before cooking down the fruit.
Do I need to sterilize the jars?
Yes, it’s important to sterilize your jars and lids before canning the jam. This helps prevent any bacteria from getting into your preserves.
- ➡Shocking Gardening Hack: 2 Kitchen Scraps Unleash a Tomato Flood in Your Backyard
- ➡The Shocking New Tricks Scammers Use to Prey on Seniors – And How to Protect Yourself Before Christmas
- ➡Shocking Phrases That Secretly Offend Millennials (You’ll Never Believe What They Are!)
- ➡The Shocking Skincare Mistake You’re Probably Making (And How to Fix It)
- ➡The Incredible Transformation of France’s Legendary Engine Plant: A Peek Inside the $100M Revamp
- ➡Unlock the Mediterranean Magic: Primark’s Crock That Transforms Your Kitchen
- ➡Shocking Revelations: Byzantine-Era Woman’s Skeleton Exposes Harsh Religious Punishments
- ➡I’m 63 and Nobody Talks About the Fact That the Hardest Part of Retirement Isn’t Boredom — It’s Realizing Your Entire Identity Was Built on Being Needed and Now You’re Just a Person With Nowhere to Be at 9 AM on a Tuesday
How much sugar should I use?
The amount of sugar you use will depend on the sweetness of your fruit. Start with 1/2 cup of sugar per 1 pound of fruit and adjust to taste.
Can I make low-sugar or sugar-free jam?
Yes, you can absolutely make jam with less or no added sugar. Just be aware that the texture may not be as thick and glossy without the sugar.
How do I know when the jam is done?
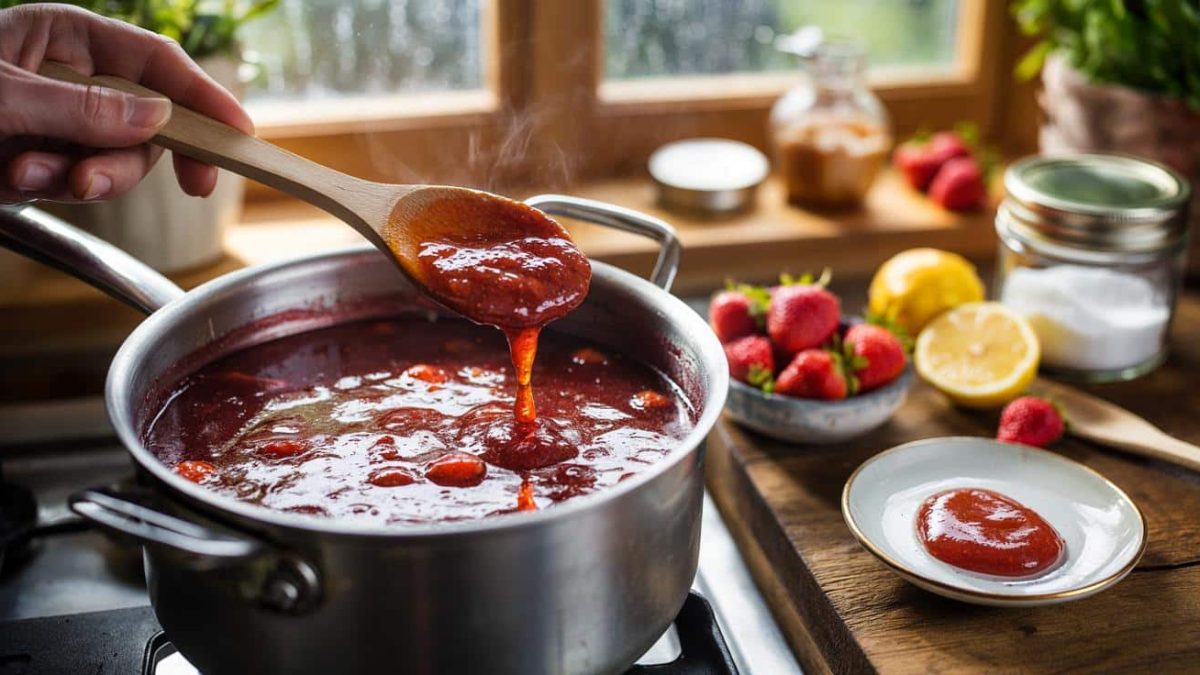
The jam is ready when it coats the back of a spoon and holds its shape. You can also do the “wrinkle test” by putting a small dollop on a chilled plate.
Can I add spices or herbs to my jam?
Yes, get creative! Try adding a cinnamon stick, vanilla bean, or fresh herbs like rosemary or thyme to your jam for an extra flavor boost.
- ➡The Shocking Truth About the End of Kitchen Islands – You Won’t Believe What’s Next!
- ➡The Easter Basket That Shattered a Marriage
- ➡Jurassic Comeback: Giant Tortoises Stun the World with Their Miraculous Return to the Galápagos
- ➡The Shocking Truth About Europe’s Aviation Boom and the French Titan at Its Heart
- ➡Exposed: The Hidden Meanings Behind How You Sign Your Name
- ➡Shocking Secrets Revealed: Where Hedgehogs Thrive in the Heart of France
- ➡Unleash the Indulgence: Oven-Baked Krapfen Without the Grease Smell
- ➡These Two Teen Girls Just Shattered 2,000 Years of Math History With a Shocking New Pythagoras Proof
Do I need to water bath can the jars?
If you plan to store your jam for more than a few months, it’s a good idea to process the sealed jars in a water bath canner for 10 minutes. This helps create a stronger seal.


