Tired of staring at those discolored, dingy grout lines in your bathroom? A complete renovation might seem like the only solution, but what if we told you there’s a quick and easy fix? Believe it or not, with just three simple ingredients and 15 minutes of your time, you can transform your grout and make it look brand new again.
No more need to live with unsightly, neglected grout. This ingenious DIY hack is about to change the game, and the best part? It won’t break the bank. Get ready to say goodbye to that bathroom renovation you’ve been dreading and hello to a sparkling, rejuvenated space.
Why Grout Gets Dirty and Stays That Way
Grout is the porous material that fills the gaps between tiles, and it’s a magnet for all kinds of grime and stains. From soap scum and hard water buildup to mold and mildew, grout can quickly become discolored and difficult to clean. Traditional methods like scrubbing and harsh chemicals often fail to make a lasting difference.
The reason grout stays dirty is that the porous nature of the material allows dirt and debris to penetrate deep within the surface. This makes it challenging to remove all the accumulated grime, leading to a permanently dingy appearance.
- ➡The Shocking Tax Deadline Blindsiding Retirees With Big Pensions
- ➡Rekordpreise an der Tankstelle: Dieses EU-Land senkt jetzt drastisch die Spritsteuer
- ➡The Surprising Way This Science Magazine Is Captivating Readers Worldwide
- ➡The Surprising Secret to Silky Smooth Hands (Without Lotion)
- ➡The Secret Manipulation Tactics That Selfish People Use to Get Their Way
- ➡The Shocking Truth About the Germ-Ridden Hotspot in Your Kitchen You Need to Know
- ➡Shocking Revelation: The Navy’s Alarming Response to the Return of the Mighty Truman
- ➡The French Drone Hub Cashing In on Ukraine’s Frontline Feedback: An Aerospace Revolution You Won’t Believe
But fear not, there’s a simple solution that can turn back the clock on your grimy grout and restore it to its former glory.
The Three Ingredients That Actually Work
The secret to reviving your grout lies in three common household ingredients: baking soda, hydrogen peroxide, and dish soap. This powerful trio works together to break down and lift away even the most stubborn stains and discoloration.
Baking soda acts as a gentle abrasive, scrubbing away surface-level dirt and grime without damaging the grout. Hydrogen peroxide is a natural bleaching agent that can help whiten and brighten the grout, while the dish soap helps to emulsify and remove built-up residue.
When combined in the right proportions, these three simple ingredients create a paste-like consistency that can be easily applied and left to work its magic on your grout.
- ➡The Surprising Reason You Need More Nostalgia in Your Life (It’s Not What You Think)
- ➡The Shocking Truth About Dental Floss That Dentists Don’t Want You to Know
- ➡The Shocking Cosmic Shift That Will Liberate These 2 Zodiac Signs This November
- ➡The Shocking Truth Behind the Atlantic’s Endless Heatwaves Exposed
- ➡Unbelievable Secrets of Antarctica’s Hidden Landscape Exposed!
- ➡The Surprising 10-Minute Bathroom Hack That Will Change Your Life (And You Won’t Believe How Easy It Is!)
- ➡Mercadona’s Torrijas Bread: The Bakery Behind the Supermarket’s Secret Recipe
- ➡Uncover the Shocking Secret to Stopping Rheumatoid Arthritis Before it Starts
Mixing the Perfect Paste Consistency
To create the perfect grout-reviving paste, you’ll need to mix together equal parts baking soda, hydrogen peroxide, and dish soap. Start with a tablespoon of each, and adjust the measurements as needed to achieve a thick, spreadable consistency.
The key is to mix the ingredients thoroughly until they form a smooth, creamy paste. This consistency will allow you to easily apply the mixture to the grout lines and ensure it penetrates deep into the porous surface.
Remember, the exact ratios may vary depending on the size of the area you’re working on, so feel free to experiment until you find the perfect formula.
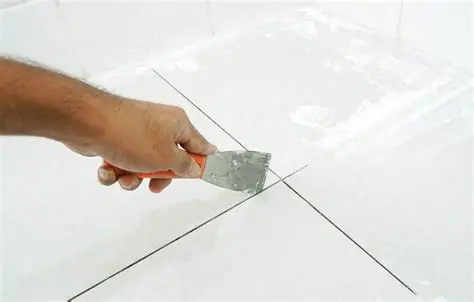
Application Techniques That Maximize Results
Once you’ve mixed the grout-reviving paste, it’s time to get to work. Start by thoroughly cleaning the tiles and grout lines to remove any surface-level dirt or debris. This will ensure the paste can penetrate and work its magic effectively.
- ➡Shocking Revelation: The Daring Engineering Gamble Behind the World’s Largest Underwater Tunnel
- ➡I’m 63 and Nobody Talks About the Fact That the Hardest Part of Retirement Isn’t Boredom — It’s Realizing Your Entire Identity Was Built on Being Needed and Now You’re Just a Person With Nowhere to Be at 9 AM on a Tuesday
- ➡You’ll Never Guess How Spain is Harnessing the Power of Pressure to Revolutionize Renewable Energy
- ➡Unlock the Secret to Harmonious Living: 2025’s Top Home Trends with SHEIN
- ➡You Won’t Believe the Secret to the Ultimate Affordable and Healthy Frying Pan
- ➡The Surprising Habits That Make Grandparents Adored by Their Grandkids
- ➡Uncovered in Spain: The Mysterious “Excalibur” Sword with Islamic Roots
- ➡The Shocking Reason Why Music With Lyrics Makes You More Likely to Make Mistakes While Shopping
Using a small brush or an old toothbrush, apply the paste directly to the grout lines, making sure to work it in thoroughly. Apply a generous amount, ensuring the paste fills the entire width and depth of the grout.
Let the paste sit for 10 to 15 minutes, allowing the baking soda, hydrogen peroxide, and dish soap to work their magic. During this time, you may notice the paste start to bubble and fizz, which is a good sign that the cleaning process is underway.
Dealing with Stubborn Stains and Mold
If you’re dealing with particularly stubborn stains or mold growth in your grout, you may need to let the paste sit for a bit longer or apply it more than once. For deeply embedded discoloration, you can try using a small scrub brush or even a toothbrush to gently agitate the paste and work it deeper into the grout.
In the case of mold, the hydrogen peroxide in the paste will help to kill and remove the fungal growth. However, if the mold problem is severe, you may need to consider using a dedicated mold-killing solution before applying the grout-reviving paste.
- ➡The Surprising Spring Savior: Why Toilet Paper Rolls Are Essential for Your Seedlings
- ➡The Shocking Trend That Took Over the Chanel Runway in Paris
- ➡The Shocking Truth About How Often You Should Wash Your Hair (Experts Reveal All)
- ➡The Shocking Hair Colours that Can Age You After 60 (And How to Fix Them)
- ➡Shocking Discovery: This Simple Trick Can Add 10+ Vibrant Years to Your Life After 70
- ➡Unbelievable Taxi Hack Keeps Your Car Smelling Brand New (You’ll Be Shocked)
- ➡The Dark Underbelly of China’s Solar Dominance: An Exposé You Can’t Afford to Miss
- ➡The Shocking Truth About Michael Schumacher’s Mysterious Separation: What Nobody’s Telling You
With a little extra elbow grease and patience, you can say goodbye to even the most stubborn stains and transform your grout back to its original clean and fresh appearance.
Protecting Your Results and Preventing Rapid Re-Staining
Once you’ve achieved the desired results, it’s important to protect your freshly cleaned grout to prevent it from quickly becoming dirty again. Consider sealing the grout lines with a clear, waterproof sealant to create a barrier against future stains and discoloration.
Additionally, make sure to establish a regular cleaning routine for your bathroom, including wiping down tiles and grout lines with a mild, pH-neutral cleaner. This will help to maintain the sparkling appearance of your grout and extend the lifespan of your DIY makeover.
With a little bit of proactive care, you can keep your grout looking like new for months, if not years, to come.
- ➡The Secret Profession That Guarantees Steady Wealth (Without the Risks)
- ➡Shocking Mistake That’s Ruining Your Tomato Harvest This Spring
- ➡The Shocking €2 Billion Deal That Catapults This Finnish Defense Giant to the Top of Europe’s Armored Fleet
- ➡The Surprising Truth About Sweet Potatoes and Regular Potatoes: A Shocking Divide Splitting Experts Right Down the Middle
- ➡Residents Outraged as New Law Threatens Apartment Pet Ownership
- ➡You Won’t Believe What These Hidden Numbers Are Revealing in This Mind-Bending Optical Illusion!
- ➡The Surprising Way a Pot of Orange Peels Can Transform Your Home Into a Fragrant Oasis (And Spark a Debate You Won’t Believe!)
- ➡The Secret Bison Manure That Transforms Tomatoes Into Flavor Explosions
Common Mistakes That Reduce Effectiveness
While this grout-reviving method is incredibly effective, there are a few common mistakes that can reduce its efficacy. First and foremost, make sure to mix the ingredients in the correct proportions. If the paste is too thin or too thick, it may not penetrate the grout as effectively.
Additionally, be sure to thoroughly clean the tiles and grout lines before applying the paste. Any existing dirt or debris can prevent the paste from working its magic and lead to subpar results.
Finally, don’t rush the process. Allow the paste to sit for the full 10 to 15 minutes to ensure the baking soda, hydrogen peroxide, and dish soap have enough time to work their way into the grout and break down the stains.
When to Call a Professional
While this DIY grout-reviving method is incredibly effective for most homeowners, there may be instances where it’s best to call in a professional. If you’re dealing with extensive damage, such as crumbling or severely discolored grout, it may be more cost-effective to have a professional tile and grout specialist assess the situation and provide a long-term solution.
- ➡Shocking Discovery in the Deepest Ocean: Scientists Uncover a Hidden World 10km Below the Surface
- ➡The Secret Behind the Lucrative World of Notary Professionals
- ➡The Shocking Uphill River Defying Gravity in America
- ➡Shocking Twist in the Passenger Jet Race: The Unexpected Player That’s Shaking Up the Industry
- ➡Unleash the Secrets of Nature’s Fragrant Masterpieces: The 7 Must-Have Perennials for Year-Round Bliss
- ➡The Shocking Astrological Secrets Unlocking Wealth and Success in 2026
- ➡The Surprising Clues Hidden Under Your Car (You Won’t Believe What They Reveal)
- ➡You’ll Never Guess How Long This Once-in-a-Lifetime Solar Eclipse Will Last!
Additionally, if you’re unsure about the composition of your grout or the underlying condition of your tile installation, it’s always better to err on the side of caution and consult a pro. They’ll be able to provide expert guidance and ensure the longevity of your bathroom’s tile and grout.
Remember, a little preventative maintenance can go a long way, so don’t hesitate to call in a professional if you have any concerns or want to ensure the best possible results for your grout-reviving project.
How long does the grout-reviving paste take to work?
The grout-reviving paste typically works best when left to sit for 10-15 minutes. This allows the baking soda, hydrogen peroxide, and dish soap to penetrate deep into the porous grout and break down the accumulated dirt and stains.
Can I use the paste on colored or sealed grout?
Yes, the grout-reviving paste can be used on both colored and sealed grout. However, it’s important to do a spot test in a inconspicuous area first to ensure the paste doesn’t discolor or damage the grout. If you have any concerns, it’s best to consult a professional before proceeding.
- ➡The Eye-Catching Secrets to Recruitment Posters that Lure Top Talent (You’ll Be Shocked!)
- ➡Unbelievable! Germany Gifts India Massive €7.7 Billion Submarine Deal, Shifting Asian Power Dynamics
- ➡The Shocking Truth Behind the US Military’s Disastrous New “Light Tank”
- ➡The Alarming Signs Your Body Sends When Burnout is Looming (Shocking Symptoms You Can’t Ignore)
- ➡The Shocking Truth About Health Trends That Actually Work (You Won’t Believe #5!)
- ➡The Surprising Resurgence of Canned Sardines: A Tiny Fish with a Big Nutritional Punch
- ➡The Shocking Food Combos That Are Ruining Your Health (You Won’t Believe #3!)
- ➡The Shocking Truth About Going Gray: What Men Need to Know Before Coloring Their Temples
How often should I reapply the grout-reviving paste?
The frequency of reapplication will depend on the amount of foot traffic and use your bathroom sees. As a general rule of thumb, you can expect to reapply the paste every 6-12 months to maintain the clean, like-new appearance of your grout. Regular cleaning and sealing will also help extend the time between applications.
Can I use the paste on tiles as well?
Yes, the grout-reviving paste can be safely used on tile surfaces to help remove stubborn stains and restore the overall appearance of your bathroom. Just be sure to apply it with a gentle touch, as the abrasiveness of the baking soda could potentially scratch delicate tile finishes.
What if the grout is still discolored after using the paste?
If the grout is still discolored after using the paste, you may need to try a more aggressive approach. This could include using a dedicated grout cleaner or even having the grout professionally resealed or replaced. In some cases, the grout may be too far gone to be revived with a DIY solution.
How do I maintain the results after using the grout-reviving paste?
To maintain the clean, refreshed appearance of your grout, be sure to seal it with a clear, waterproof sealant after using the paste. Additionally, establish a regular cleaning routine using a mild, pH-neutral cleaner to prevent future staining and discoloration.
- ➡The Shocking Database Error That’s Exposing Sensitive Information (You Won’t Believe What Happened!)
- ➡You Won’t Believe What These Married Couples Revealed About 35 Years of Marriage
- ➡Unbelievable Transformation: How Paris Became a Sustainability Powerhouse by 2050
- ➡Unlock Jaw-Dropping 4K Luxury for Shockingly Low Prices – Hisense QLED TV Deal You Won’t Believe!
- ➡At a State Banquet Attended by World Leaders, Kate Middleton’s Lace Embroidered Gown and Signature Accessory Dominate International Headlines
- ➡You Won’t Believe What This 25,000-Ton Chinese Ship Can Do – It’s Shocking!
- ➡The Winter Window Cleaning Secret That Cuts Streaks in Half
- ➡Farmers Defy Chemicals to Grow More Nutrient-Dense Produce
Can I use the paste on floor tiles as well?
Yes, the grout-reviving paste can be used on floor tiles, but it’s important to be extra cautious when working on horizontal surfaces. The paste may be more prone to dripping or spreading, so take your time and apply it carefully to ensure even coverage and optimal results.
How long does the grout-reviving effect last?
With proper maintenance and care, the effects of the grout-reviving paste can last for several months to a year or more. Regular sealing and cleaning of the grout will help extend the lifespan of the transformation, but you may need to reapply the paste periodically to maintain the desired clean and fresh appearance.


